Which Compact Digital Camera?

Over the last few days I have had two separate people ask me about what I would recommend in terms of a compact digital camera. It just so happens that this somewhat coincides with me taking the plunge and finally replacing my dear old Canon G9 compact camera which stopped working after a fall about 6 months ago. Therefore, what follows is a run-down of what I considered (for about 4 months) when researching cameras.

To summarise this massive blog post, for someone who wants a no-fuss compact camera with good manual controls, then I would seriously look at the Nikon P300, Panasonic LX5, or Sony HX9v.

I considered 4 cameras as definite contenders for what I wanted the camera for: the Olympus XZ-1, the Nikon P300, the Panasonic LX 5, and the Panasonic Lumix GF1. Important features for me were compact-ness, good quality video, a fast lens (a lens which allowed good photography in dark situations), and the ability to get nice depth of field (that sexy effect where the subject is focused, and the background is all blurry), and also the ability to add conversion lenses (like fisheye lenses and other ultra-wide angle lenses).

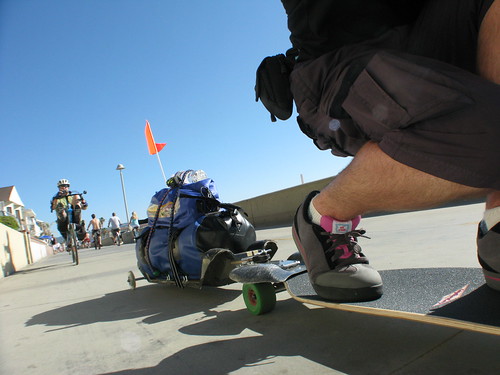
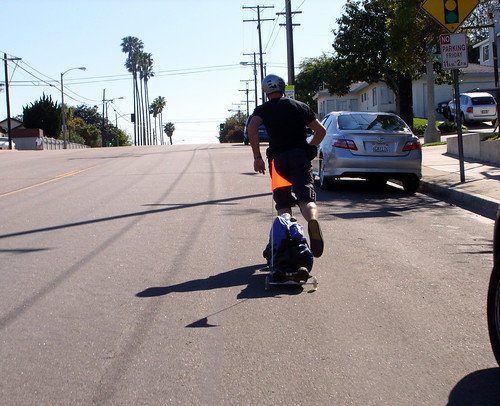
When I chose the Canon G9 way back in 2007, I chose it more or less because it was the top of the line Canon compact camera and, I could add relatively cheap conversion lenses for shots of me on my longboard or bike.

35km downhill from Santai, Xinjiang Province, China The monks of the Arou Buddhist Temple in Arou, Qinghai Province, China

Reflections near Chaowu, Anhui Province, China

Therefore, this time around I was also looking at the top of the line compact cameras, in order to get the best performance in a small package. This also meant that I was also looking at paying a decent price for the camera (up to about US$400). The reason I didn’t consider the current generation of the Canon G-series (the G12), was because of the poor video performance (http://www.dpreview.com/reviews/CanonG12/page9.asp).

In the end, I bought a second hand Panasonic Lumix GF1, and I will explain the reasons for that at the end, but first, here are the considerations I made regarding the other three options:

Good Quality Video
First of all, let me define good quality video. I was looking for 1) the possibility of high frame rate recording (60fps), 2) high quality high definition video (at least 720p). I figured that 60fps would give me options for nice slow motion editing, more so than 30 frames per second (which is what seems to be the standard at present for compact cameras with decent video options). But then of course video quality is not all about frames per second. The degree to which the video is compressed is also a factor in how good the video looks on screen. Most high end compact cameras record at about 17Mbps, which is just fine, really. But if increasing the bit rate (decreasing the compression) was possible, then that would be an advantage. In terms of frames per second, the Nikon P300 came out trumps. It can record in 720p HD mode at 60fps, which I thought was pretty cool. The bit rate is also at a respectable 17Mbps. I did read one review which did not rate the autofocus very highly, but all in all it looks like a decent camera from a video quality point of view. The Olympus XZ-1 in video mode shoots at 30fps, and also records at 17Mbps, but there are plenty of reviews out there which suggest there is much room for improvement in terms of autofocus (the camera keeps trying to re-focus) and manual controls in video mode (that is, there are none). The Panasonic LX5, while it does not shoot at true 60fps (it has a 60fps setting, but it is actually shooting at 30fps, and just doubling each frame), allows manual control in video mode, and looks like a very capable camera (albeit quite bulky, as is the Olympus).

Conversion Lenses
Conversion lenses are lenses which fit over the stock lens of a compact camera. That is, on fancy SLR cameras, you interchange the lenses, physically removing the lens each time you want to change lenses. On some high end compact cameras, you can “sheath” the existing lens inside another lens, for either super wide angle shots, fisheye lens shots, or super long telephoto shots. The ultimate factor which put me off the Nikon P300 was the fact that it doesn’t take conversion lenses. I like to be able to have the option to add super wide angle lenses, and even though the Nikon P300′s 24mm equivalent lens is very wide as it is, I wanted to go even wider (as per the shots above). The Olympus XZ-1 and Panasonic LX5 do take conversion lenses, but due to the Olympus XZ-1′s bad video reviews, the Panasonic LX5 was definitely the winner here.

Compactness
The clear winner here out of the Nikon P300, Olympus XZ-1, and the Panasonic LX5 is the Nikon P300. You do really get an amazing camera in a very small package (comparatively). You wouldn’t really want to put either the Panasonic LX5 or Olympus XZ-1 in your pocket, but you’d probably get away with it with the Nikon P300.

Depth of Field
When I tried out the Olympus XZ-1 in a store here in Sapporo, I was amazed at the depth of field (the camera was also very fast at starting up, by the way; more than the others). dpreview.com consider it one of the better performing compact cameras when it comes to depth of field and I could see why (see here for the review: http://www.dpreview.com/reviews/OlympusXZ1/).

Fast Lens
Generally, the smaller the f-value, the nicer the background blurring is. Also, the smaller the f-value is, the more light passes through the lens. Which means that you get better pictures/video at night time or indoors with low light. The Olympus XZ-1 has a very ‘fast’ lens; the lens is f1.8. The Nikon P300 also has an f1.8 lens, but the reason that the Olympus XZ-1 outperforms here is because it also has a larger sensor than the Nikon P300 (why the sensor matters, I’m not quite sure…more area for recording pixels?). In any case, The Panasonic LX5′s lens has an f-value of f2.0, which is pretty fast, and has the same size sensor as the XZ-1.

My Recommendation for a Compact Camera (non-interchangable lens type)
Based on the above considerations, and because I love the option of using conversion lenses, I would have gone with the Panasonic LX5. If, however, conversion lens compatibility is not an issue, the Nikon p300 would be my recommendation (based entirely on reviews I have read, not extensive hands on usage). The Nikon P300 has the same size sensor as my old Canon G9, and I got some pretty decent photos out of that.

EDIT: The Sony HX9v also looks like an even better choice than the Nikon P300: Write-up here at DSLR New Shooter. Doesn’t have a super fast lens though…

Conclusion (what I ended up getting)
As I said at the beginning of this post, I actually ended up getting a second hand Panasonic Lumix GF1 (body only). This is kind of like an SLR camera, but has no viewfinder, and hence is much more compact than an SLR camera. It is what is called a ‘micro four-thirds’ camera, which means that the sensor size is about 2.5 larger than the Olympus XZ-1 and Panasonic LX5′s sensor, but is about 40% smaller than mid-range DSLR cameras. The ‘micro’ part more or less means that there is no optical viewfinder (more info here: http://en.wikipedia.org/wiki/Micro_Four_Thirds_system). In other words, I can use fancy lenses interchangeably, and get awesome depth of field, and all the other benefits of a larger sensor (whatever they are).

Along with the camera body, I bought a 1970′s manual focus Canon FD 50mm f.14 S.S.C. lens, which can be bought online for around US$50 to US$100, and used on the GF1 with an adapter. Buying second hand means a much cheaper package all round. NOTE: Due to the smaller size of the sensor on the GF1 (compared with bigger SLR cameras), a 50mm lens becomes 100mm, meaning that it ends up being somewhat of a very long lens!

Rojiura Surry Samurai, The Soup Curry Master, Toyohira-ku, Sapporo, Japan 2011 Yosakoi Soran Festival (YOSAKOIソーラン祭り) in Susukino, Sapporo, Japan

A soft red dice...you can chew on it

Also a very large part in getting this GF1 (rather than the more recent GF2, or this week announced GF3), apart from price, was that there is a sneaky hack out there which allows a user to increase the quality of the video the camera takes. Without going into too much detail, the camera essentially records at 720p, 30fps, at 17Mbps. This provides very nice video, but using the Ptool firmware hacking tool, it is possible to increase the bit rate to up to 100Mbps! This equals very fine details in video footage. You can also increase the resolution to 1080p, but apparently this does not really increase video quality all that much, so I am more focused on getting the best I can out of the 720p. The frame rate can also be changed to 24fps, but not to 60fps. Using the 50Mbps AVCHD Fast Action 3-Frame GOP Patch, I now have a very compact digital interchangeable lens camera which can take extremely high quality video. Below is a video I took before applying the hack, which just goes to show how good the video is at the stock settings (taken on the Motion JPEG setting).

Here is a video I put together of footage taken with the hack applied (in AVCHD, auto white balance, hand-held):

Was the Micro Four-Thirds Camera Worth it?
The problem with the interchangeable lens camera malarkey, is that while you can get some great quality shots, you have to lug around so much more gear. More lenses etc. If you want to travel ultra light weight, then this is the camera to have if you just have to have SLR quality. But if you just want an awesome point and shoot, then this is not worth it. Lenses cost money, camera bags cost money etc etc. That is what I have discovered. When I had my Canon G9, which produced some great photos (if I do say so myself), I could carry it in a small pouch on my belt, and add the cheap fisheye conversion lens (which generally was kept in a simple nylon bag) when I needed it. Simple and light and cheap and robust. Now, I find myself wanting that $800 fisheye zoom lens, and wanting that $400 standard zoom lens, and wanting that $500 portrait lens….

I am, however, stoked to have the micro four-thirds camera. I feel like this will open up all new avenues of expression and creativity. But to my friends who may not care about what the difference is between f’s and mm’s, I would say that the extra bulk and weight of big lenses (even on small camera bodies like even the new Panasonic GF3) is not worth it. Go for the Nikon P300 with its nice wide 24mm zoom lens, very compact size, decent video abilities. If a slightly larger camera size is OK, then go for the Panasonic LX5 for better performance. Or consider the Sony HX9v.

Is Video the Only Thing You Care About?
No. I love photos too. But the thing is, as far as I can see, it seems that in terms of photo-taking prowess, the cameras in this post only really have very small differences. That is to say, advances in sensor quality, lens quality, photo-taking prowess etc are now very small; quality is just that high. However, the next few years will see, as the last few years have seen, very big leaps in compact digital video technology. So, while still photography prowess is something to consider, for me, video capture technology is the exciting thing to be following.


Day 818 – NEW ZEALAND: Street Machine GTe back to its former glory

Waaay back in Switzerland when I decided to send my bike back to New Zealand, I got a shock when I did some research on how much it was going to cost to get a regular sized bike box to New Zealand. I was even considering just leaving the bike in Switzerland due to the high cost. It was going to cost 300 Pounds Stirling to get it to New Zealand. Big bucks.

The only solution I could figure out was to try to get the bike into a smaller box. That way, I would be able to send it surface post via the local post office, rather than through a dedicated shipping company. This meant that I had to take the bike to bits big time. The bike is full suspension, so the frame breaks down into three separate bits. With no intention to re-use the cables etc once I got back to New Zealand, I threw those out. I did the same for the chain tubes. Putting the thing back together and getting all the parts took the better part of two days.

I got the bike together in the end, but not without some improvisation.

A standard recumbent bicycle uses a chain three times the length of a standard upright bicycle chain. Often the chain runs through plastic tubes to stop the chain from rubbing on clothing, and to keep dirt off the chain. After 12,000km, the original chain tubes on my bike were well and truely worn, despite them being made of low-friction PTFE plastic.

Even in Auckland, the biggest city in New Zealand, I could not find PTFE tubing in the correct size (15mm outside diameter, with at least 1mm wall thickness). So I had to settle with the slightly less friction resistant polyethelene garden irrigation tubing.

A small but significant challenge was moulding the tubing to my use. I had to straighten the tubing, which was easy enough (pour boiling water down the tubing while holding the tubing upright). I also had to spread the ends of the tubing in order to prevent the chain from catching on the edges of the tube.

TOP TIP: How to Spread the Chain Tube Ends for a Street Machine GTe Recumbent Bicycle

For this trick, you’ll need three things; a bottle of Finish Line chain lube, a cup of boiling water, and your chain tube cut to the correct length.

How to spread the ends of a chain tube for a Street Machine GTe recumbent bike How to spread the ends of a chain tube for a Street Machine GTe recumbent bike

How to spread the ends of a chain tube for a Street Machine GTe recumbent bike

Put the end of the chain tube in the boiling water for 30 seconds.

How to spread the ends of a chain tube for a Street Machine GTe recumbent bike

Remove the chain tube and quickly transfer it to the lube bottle cap without delay. Once over the tip of the cap, push down firmly so that the soft end forms to the shape of the cap. Push down enough so that the edges of the tube push past the edge of the cap by about 1mm. You’ll need to really shove hard.

How to spread the ends of a chain tube for a Street Machine GTe recumbent bike How to spread the ends of a chain tube for a Street Machine GTe recumbent bike

Keep the pressure on for about 20 seconds, and then remove the chaintube from the cap. If you remembered to put the chain tube guide on before you started (for a Street Machine GTe) then you can now slide the chain tube into place.

How to spread the ends of a chain tube for a Street Machine GTe recumbent bike

Day 755 – CHINA (SHAANXI): Gear Reviews

Long overdue, I spent a rainy day here in Xi’an inside the hostel lobby using the free internet to write up some reviews of the gear that I have used over the last few years. If there’s anything in my kit lists that you would like to hear my opinion of that is not included in the reviews, then please let me know and I’ll sort it out.

Gear That Workedhttp://14degrees.org/en/?page_id=709
Gear That Didn’t Workhttp://14degrees.org/en/?page_id=710

My kit-lists:

Skating kit-listhttp://14degrees.org/en/?page_id=10
Cycling kit-listhttp://14degrees.org/en/?page_id=289

Day 755 – CHINA (SHAANXI): Holey Shiny Trucks Batman!

New holey trucks in Xián, Shaanxi Province, China

I can’t remember the last time I was this happy…all due to a little brown box waiting for me at the hostel reception this morning.

Package waiting for me at the hotel reception in Xián, Shaanxi Province, China

I am using Holey Trucks, and so far I have hardly touched the original ones I began skating on over a year ago in Switzerland. They came standard on the Rollsrolls longboard that I bought, and have now held up to just over 10,000km of abuse not only over some of the roughest skating terrain in the world, but also supported me and my gear for that distance, a total weight of over 100kg at times. I am truely happy with their performance.

I emailed Holey Trucks, asking them if they could get some replacement parts to me, since the original trucks were getting understandably worn. In the photo below you can see the comparison between the pivot on new trucks, and the worn pivot on the old trucks. Over time, grit and moisture has worked like a grinding paste to wear down the pivot, which supports a lot of weight as it turns.

Old and new Holey Trucks in Xián, Shaanxi Province, China

This pivot point is cradled in a low-friction nylon pivot cup, and this also showed signs of considerable wear. This means that after 10,000km, the pivot no longer fits snugly in its spot on the baseplate and this in turn means that the truck no longer turns smoothly. Rather, it jerks from side to side as I am trying to turn.

My original plan was just to replace the nylon pivot cups, but Holey got back to me and advised that the wear on the pivots themselves would cause issues, even if only the pivot cups were replaced. It would have been nice to keep the old trucks till the end of the journey, but when Holey offered to replace the trucks, I could not refuse.

I was truely impressed with how fast Holey Trucks got the new trucks to me. I was fully expecting it to take weeks for them to arrive. In less than a week they were here at the hostel. Ask any long distance traveller and they will tell you that getting replacement parts on the road can be a nightmare. Markus Wagner, from Germany, is cycling from Germany to China right now, and he had a horrible time trying to get replacement equipment to Turkey. Big thumbs up to Holey Trucks.

New holey trucks in Xián, Shaanxi Province, China

It was 10am when I got the package from the reception, and it was just as I was about to head out the door for breakfast. Breakfast would now have to wait however…first things first…gotta get the new trucks installed.

Old and new Holey Trucks in Xián, Shaanxi Province, China Old and new Holey Trucks in Xián, Shaanxi Province, China

IMG_3947

The floor in the hostel dorm room I am staying in quickly became my workshop.

New holey trucks in Xián, Shaanxi Province, China

Off came the old trucks and on went the new ones.

New holey trucks in Xián, Shaanxi Province, China

The difference in turning power was instantly obvious. Complemented by the nice wide, concave Longboard Larry deck, it is amazing how these truck turn. Very nice.

New holey trucks in Xián, Shaanxi Province, China

Still in the post are some harder durometer bushings, so hopefully those will arrive by the time I am back here in Xián in a week or so. I think some harder durometer bushings on the back truck will help with trailer stability, by reducing the amount that the rear truck turns.

As for the old trucks, I will be sending these to Surrey Skateboards (England’s oldest skateboard store) to be enshrined amongst all their other skateboarding history paraphernalia. Gavin, a long time resident of the Surrey Skateboards shop, is also the mastermind behind the design of Holey Trucks, and it’s only fitting that the furtherest travelled trucks in the world go that funky shop. I haven’t cleaned the old trucks properly (ever), so hopefully England customs is OK with Chinese/North American/European road grime entering the country…

Day 685 – CHINA (XINJIANG): Now, where was I?

Greetings from Turpan. Yes, I was here two weeks ago. In two weeks I made it about 95km. Har. But all is well…

How much does it cost you to go to a film at a movie theatre in your country? I presume it’s not much less than 10 to 15 Euro. I bought a DVD player (brand new) for 15 Euro a week ago, and enough VCDs of the most recent blockbuster films for abour 5 Euro. So for 20 Euro, I was set up. Lay in my hotel room for most of every day. Two favourites from the epic film screening: Bandits with Bruce Willis (don’t let that put you off, it’s actually quite good), and Master and Commander with Russel Crowe.

I did get something constructive done also (not that rest is not constructive). The board I am riding at the moment is a Longboard Larry custom pusher, and it is what is called a dropdeck board. That is, the trucks (axles) are attached to the top of the board, rather than the underside. This means there is a hole in the deck where the whole thing goes through.

Anyway, I decided to drop the deck even lower, so I mutilated a plastic riser and set it up so the deck is now a further 1.5cm closer to the ground. A small change, but over many miles, it makes a difference. Less energy required for each push.

Lowering the LBL Distance Pusher even more (Shanshan, Xinjiang, China)

In other news, I now have a second Chinese visa extension in hand. Here in Turpan, I dropped my application off at the PSB in Turpan (Regional Public Security Bureau – 地域区公安局 (gong an jie)) at 12 noon, and picked up the fresh 30-day extension at 5pm that same afternoon. This is very different to a big city like Urumqi, where it took 5 days. It cost the same as the first extension – 160RMB (16 Euro). The extension was from the day that my old extension expires. This was unlike the case in Urumqi, where my extension was from the day I applied for the extension. The PSB in Turpan had application forms, did not require proof of residence, and I had the required passport photo available.

So the grand plan is to hang out in Turpan this weekend, and take a bus back to Shanshan on Monday morning, where I will begin skating at 6pm on Monday towards Hami. The plan at present is to skate naval style – in shifts (watches) of 4 hours at a time. From 6am till 10am, and then from 6pm till 10pm. In Turpan yesterday it was 43 degrees Celcius at 2pm. The overnight lows are not low at all – 28 degrees last night.

By 10am, it is just starting to get unbearable. At 6pm, it is still very hot, but within an hour the direct sunlight is drifting off towards the horizon. I hope to skate four or five 40 minute intervals within each four hour shift. It will be a very rigid schedule, but one that I will have to keep to if I am to get out of this desert that I am feeling rather stranded in!

Day 633 – USA (CALIFORNIA): Game on!

Today’s distance / ???????: 22 miles / 36km
Average speed / ????: 12.8mph / 20.7km/h
Time on skateboard / ????: 1h 43m
Total skateboarding distance to date / ????????????: 4161mi plus 280mi (?) / 6697km plus 450km (?)
Ascent / ??: n/a
Descent / ??: n/a
End-of-day GPS coordinates: n/a

Hold me back. The world of solo long distance skateboarding (albeit a small world at present) is going to change forever. Behold the longboard touring trailer.

The longboard trailer in action in Redondo Beach, California, USA

The thing works a charm. Uphill, downhill, on the flat, rough pavement, urban skating, the whole lot. All my concerns regarding hauling a loaded trailer behind my longboard have been thoroughly blown into pieces after a 20 mile skate from Redondo Beach to Los Angeles Airport and back.

My average speed on the short skate was 20.7km/h (12.8mph). For this test ride, I was pulling about 30 pounds (16kg). That’s faster than I’ve ever gone loaded down with gear.  This is very, very exciting. In fact, when I was on my loaded touring bicycle, I never recorded a full day of cycling where I averaged more than 20km/h. Granted, today’s ride was more than 50% on super smooth boardwalk, but I was dodging pedestrians and slow bicycles, and it was a headwind on the way home.

The only drawback for my setup is that essentially I am pulling a US$570 trailer. The Rollsrolls deck works a treat (low to the ground, lightweight), but to buy one just for the purpose of a trailer would be a little extravagant, I feel.

The longboard trailer in action in Redondo Beach, California, USA The longboard trailer in action in Redondo Beach, California, USA

So…if you read yesterday’s blog post, you’ll know that I had some serious issues with load stability on the trailer. The trailer wheels at the back were spaced too close together, making the whole setup too unstable. On corners and with sharp carving on the board, the trailer would fall over. Superstar Kirk drove me all over town this afternoon on a quest to find the perfect super-wide truck to aleviate the problem.

Getting some advice from a skate shop in Redondo Beach, California, USA

We visited many speciality skateboard shops on the quest. Shop after shop, we got the same answer. The widest available is 215mm wide. That’s only 30mm wider than the one I had. We were not giving up however, and at last, the last local skateboard shop in Redondo Beach, Surf Skate Smoke, we found what we were looking for. From the first step in the door, it was evident that this was the most unlikely place for us to find what we were looking for.

Various drug paraphenalia lined the glass cabinets and shelves. The air smelt of incense. A couple of blurry eyed guys were in the store dusting the livid couloured glass bongs. Or are they called dongs…I don’t know. Anyway, the closest guy, dark shadows under his eyes, asked what we were after. “A really wide skateboard truck,” I answered.

He showed us a couple of Carve Boards that certainly had wide trucks on them, but the mounting pattern didn’t fit wth my longboard. Then I saw what I was after. A simple, cheap kids’ mountain board. The trucks would fit my board. Massive, wide, thumping great big trucks.

The owner of the store was nearby. I asked if he had any spare trucks hanging about.

“Nope, but you can have the board for $100. That’s cost. The price I paid for it. No one is going to buy the thing anyway.” he replied.

“But all I need is one truck,” I said.

“What would I do with a board with only one truck?” was his reply.

Fair enough, I figured. But I wasn’t going to pay $100 for one skateboard truck that online would have only cost $20. But I was in a dilema. Walk away, and I would still have an unstable trailer. Plans for skateboarding across China with a trailer would be ruined.

“OK, I’ll give you $80 for it.” I offered. $80 for a skateboard truck was not even in the realm of reasonable, but I really needed it.

“I usually sell the board for $190, and I’m giving it to you at cost at $100. So $100 it is, take it or leave it.” he replied.

Time to pull out the big guns, I thought. I gave him the low-down. Give me the trucks for a lower price, and get some exposure on my website, I offered. Guinness World Record, blah blah.

“You see what this shop is? You understand what we sell here, right? Are you sure you want to link to our website?” he warned.

To be honest, I wasn’t keen at all for any association with his website or store. But I really needed the trucks. “Yeah, no problem,” I lied. I wasn’t feeling good about it, but we had exhausted all of our other options for finding what we needed to make the trailer work.

In the end, he gave me both trucks on the board for $60. Thank you to Surf Skate Smoke for your wonderful assistance in making my dream a reality.

Superwide truck for the longboard trailer in Redondo Beach, California, USA

We got back to Kirk’s place and fitted the superwide trucks. They worked a treat. Even with hard sharp carving, the loaded touring trailer stays upright.

(Thanks to Kirk Crawford for the pic)

Day 632 – USA (CALIFORNIA): Great idea but…

Nothing quite like leaving everything to the very last minute. We are experiencing some major issues with the trailer at present, and I’m leaving tomorrow night. Ouch. This is going to be a cliff hanger.

Kirk and I made an early start on getting the longboard trailer into shape. We spent most of the morning driving around aquiring the various required parts. U-bolts, nylon webbing, nuts, bolts, washers…once all was together, the construction began.

I couldn’t help but think that the likes of Peter Sanftenburg (Rollsrolls owner and creator) and Dave Cornthwaite (UK Rollsrolls distributor) would be having kittens if they saw us ripping into a Rollsrolls deck, making it into, of all things, a trailer:

The Rollsrolls deck becomes a trailer in Redondo Beach, California, USA The Rollsrolls deck becomes a trailer in Redondo Beach, California, USA

The Rollsrolls deck becomes a trailer in Redondo Beach, California, USA The Rollsrolls deck becomes a trailer in Redondo Beach, California, USA

The Rollsrolls deck becomes a trailer in Redondo Beach, California, USA

The reality is, the Rollsrolls deck makes a fantastic trailer. It’s nice and stiff, really lightweight, and being so narrow, it doesn’t get in the way of my foot as I push the front board.

Once we got the whole thing together, I strapped on all my gear. The first impression was not good. As soon as I turned, the trailer flopped over on its side. Even at relatively slow speeds, the trailer was very unstable. The culprit? The rear truck is too narrow. Not wide enough. It’s narrower than the load itself, so naturally even the slightest amount of sideways force is enough to push the trailer off balance. A moderate side wind would even be enough.

Kirk and I decide that what we need is a really wide truck at the back. Like a mountain board truck. If we had a week worth of time to order one of the internet, we’d be fine. Problem is, it is Sunday tomorrow. And I leave in the evening. How to find a shop that sells mountain boards, that has spare parts? It is not going to be easy.

Day 628 – USA (CALIFORNIA): A trailer? On a skateboard?

Mmmmmmmm. Fruit. Went to the farmer’s market with Donna today. Mmmmm. Fruit.

Fruit at farmer's Market in Redondo Beach, California, USA Fruit at farmer's Market in Redondo Beach, California, USA Fruit at farmer's Market in Redondo Beach, California, USA

But in more important matters…I’ll be blowed if I’m going to haul 20kg of gear and food and water across China on my back. So I’m going to use a trailer. Let me tell you how this is all going to work…

About four weeks ago, I had the wonderful fortune to meet Karen and John Poole, a wonderful long distance cycling couple. That was on day 581 waaaaaaay back in Texas (shudder). John and Karen’s son, Cory, is a longboarder from way back, and is very active in the long distance skating scene in Oregon, a state here in the US. Cory called me out of the blue one day in the middle of the desert in Texas, and I enjoyed chatting with him. I mentioned that I was considering opening up an invitation to board builders in the US to make a board for my skate across China.

To cut a long story short, Cory mentioned this to Longboard Larry from up in Oregon, and a month later, he is putting the final touches on a new board for me as you read. Also in the works is a coupling device that will attach a trailer to the new board.

The trailer at this stage will be very simple. I will be using my old Rollsrolls deck (the one I have been skating on for the last 7,000km). Haven’t quite worked out yet how I will attach my gear to the trailer. Perhaps attach some u-bolt-like steel hoops to the deck and then use bungee cords…

In any case, this is all very experimental. Cory mentioned someone he knew who used a trailer behind his longboard skateboard, but apart from that I have not heard of anyone else even contemplating this. It is hard to know whether this will improve efficiency or hinder it, but I am fairly sure that with less weight on my back, my body will not have to work as hard.

So, within the next few days I hope to receive the board and coupling in the post, and have a chance to give the whole setup a few practice runs along the beach cycle paths here in LA before setting off to China.

Jolly exciting.

Oh and the Chinese visa. I have no answers. Gonna have to play that one by ear.

When Homeless Take Over The World

Did you know that there is a revolution happening right on your doorstep? It is here, and you need to be a part of it.

You    must    conform    to    the     cardboard    people

When Homeless Take Over The World

From the site:
Soon, in a time not far from now, things will change and the people of East Hastings will take the world back from their evil wealthy oppressors. It’s only a matter of time until a batch of dodgy meth genetically mutates the users into Super Humans. There will be blood shed and the once joyously used needles wasted, the spread of ‘the aids’ will be unstoppable. The only survivors of this horrible plague will be… the cardboard people. After years of suffering they will be immune to ‘the aids’, they will be the new rulers and cardboard will be our gold.
 
Prepare yourselves!!!!!!!
 
Live derelict, buy cardboard……….

When Homeless Take Over The World

Day 125 – Thermarest repaired

While in Tajikistan, I slept out in the open one night. Problem was that it was dark when I put my sleeping mat down. In the morning I pulled out two big thorns from the mat, leaving some nice punctures.

I did however have a thermarest repair kit with me, and today I got around to fixing the punctures. Here’s how:

How to Repair a Punctured Thermarest

Step one
Get the kit ready.

Thermarest repair

Step Two
Mark the puncture with a circle slightly larger than the patch. You may need to put the fully inflated mat into a sink full of water in order to find the leak (look for bubbles).

Thermarest repair

Step Three
Chuck the hot bond in boiling water for three minutes.

Thermarest repair

Step Four
Remove the hot bod from the water, rip it open, and apply it to the thermarest, kneading it into the fabric with the applicator. Then put the patch onto the glue. You have about 45 seconds when it is cold in order to get the glue applied and the patch on.

Thermarest repair

Step Five
Put a plastic bag over the patch and glue, and then place the pot of boiled water on top for 60 seconds. According to the instructions, the hot pot will not damage your thermarest if the valve is open.

Thermarest repair

Step Six
Remove the pot and immediately roll over the patch a few times with a cyclindrical object such as a metal water bottle (you can easily peel the hardened glue off the bottle afterwards).

Thermarest repair

Step Seven
Leave the thermarest undisturbed for 10 minutes. The mat is now ready for use.

Thermarest repair