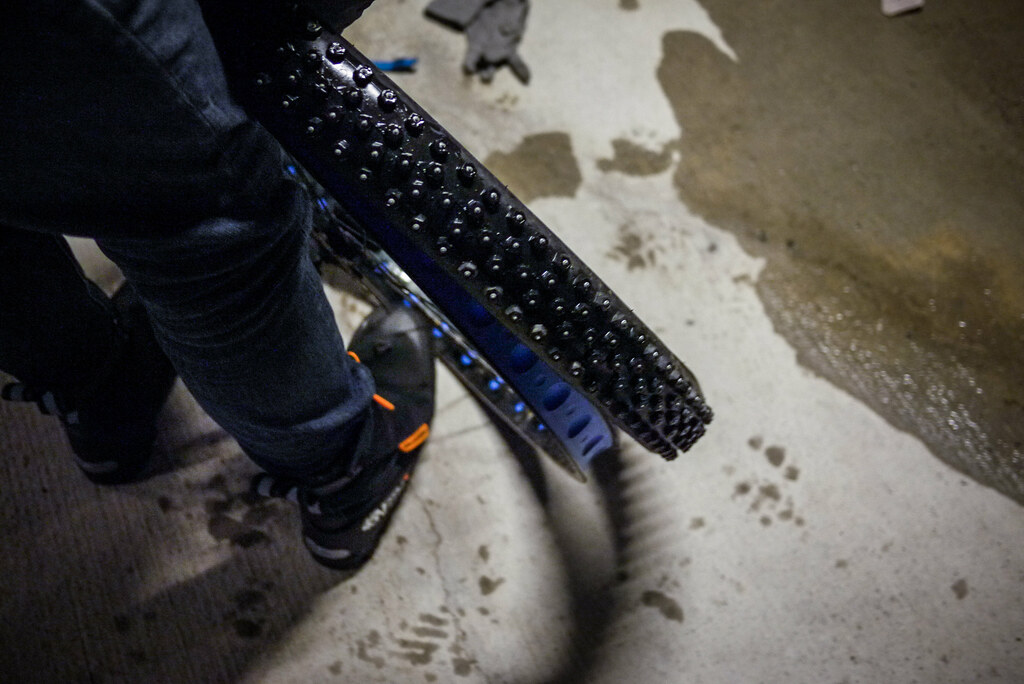
For four months of the year here in Sapporo, we cycle with spiked tires. That’s mid-December till mid-March. At the beginning of winter, in December, the decision to make the change from normal tires to spikes is fraught with uncertainty: It is snowing today, but will there still be snow on the ground in a couple of days? Inevitably, I do end up cycling a week or so on bare asphalt before the roads finally become firmly in the grip of snow.
In March, the opposite uncertainty is true: The roads are clear today, but will there be a big snowfall in a couple of days? That said, I’m pretty sure today was the right day to make the switch. I’ve grown tired of noisy metal spikes on pavement (and the bewildered looks from pedestrians as I noisily approach).
Haidee was there to document the 45-minute procedure in a relatively balmy 3 degrees Celsius.
First, off with the spikes on the front tire. I use the excellent Schwalbe Ice Spiker Pro tires. This is my third full season on the tires. I think they’ll last another couple of winters. With more than 400 aluminium-embedded carbide studs in each tire, they are some the most expensive mountain-bike-sized studded tires you can buy. But even then they cost less than a full tank of gas in most automobiles.
I opted to switch out the tubes for some lighter-weight ones. This is not so much for the literal weight savings, but the thinner tubes make the tires as a whole more pliable, making for a more comfortable ride (tubeless would be ideal, and I intend to make the change at some point).
The after-switch tires are the fat and plush Schwalbe Big Apple tires. These tires have a very pliable sidewall. That plus very high volume of air makes them a very comfortable and fast ride. This will be my third season on this set of tires. Wear looks to be acceptable on both tires.
I have a Shimano Alfine 8-speed internal gear hub (IGH) on my back wheel. This means removing the back wheel involves a few more steps than a standard quick release setup. I also have a full chain cover (Hebie Chainglider). I haven’t removed the chain cover all winter, and the chain looks in relatively good shape (I give it regular squirts of very light lubricant).
The completed job…
Could do with a more thorough clean of the bike, but that’ll have to wait till a warm weekend.
After a third of a year on the knobbly crunchy spiked tires, the slicks feel like I’m on a magic carpet: Quiet, smooth, steering more direct. Lovely.
Jobs still to do:
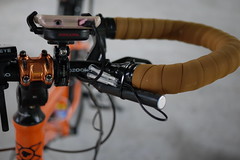
Change handlebars to ‘butterfly’ trekking bars
Take the bike to bits and re-apply anti-rust to the inside of the frame
Change the brake pads (Aztec Organic are my pick for quiet braking)
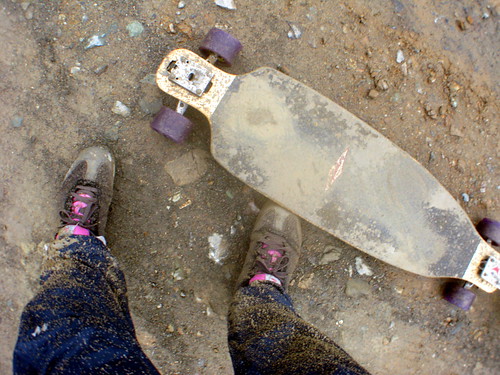
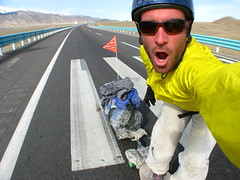
Way back in 2008, I was in western China sitting in a stifling internet cafe. I had already skated over 6,000 miles (9,600km) across the US and Europe, but in the previous days, I had spent a couple of days skating on wet roads, getting legs covered in road grime, yak shit, and slug guts. Some of the roads were also hard-packed dirt, which were still skateable when they were wet, but caused havoc on my shoes and clothes. This was a super frustrating issue. Sure, dirty pants and dripping wet shoes can be cool. But not when you want to sit down at a restaurant, cafe, internet cafe, someone’s chair in their house, etc.
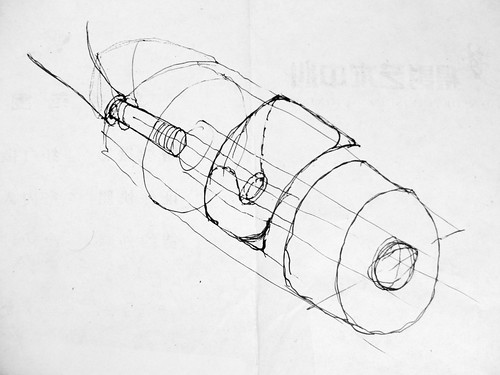
Sitting in that internet cafe, I thought up an idea for a fender/mudguard setup for a longboard. Below is the sketch I did in 2008, to explain the idea to my product-designer brother. “Can it be done?” I asked. He was confident that it could be done, but it would require a lot of work prototyping before a decent device could be created. The idea promptly got put in the too-hard-basket.
Fast forward to 2012. I get an email out of the blue from Chase Kaczmarek from the US, asking for my opinion about his invention called Wheel Shields. He was developing them into a marketable product. I said that they are brilliant. A year later, he’s got a very elegant, refined product ready to produce. The one thing he’s not got is money to create the tooling to mass produce them. That’s where his Kickstarter Campaign comes in: http://www.kickstarter.com/projects/1522548247/wheel-shields-longboarding-technology.
He needs US$25,000. He’s raised just over US$14,000 so far, with 11 days left in his fund-raising campaign. I’ve already pledged my support by ordering a set. I really want to get my set of Wheel Shields. It will mean that skating to school and work will be a reliable option, without having to worry about rain during the day creating wet roads. So do get in there and support a great idea and the masses of work that has gone into making them work: http://www.kickstarter.com/projects/1522548247/wheel-shields-longboarding-technology.
To be honest, I think for purely distance skaters, who are not concerned with wheelbite or ‘shoe-bite’ or stand-on-wheels-tricks, they are a little bit on the over-engineered side. For just ‘fender’ or mudguard applications, light plastic would be fine. But still, I do stand by my words: Wheel Shields are brilliant. Hands down the biggest innovation in longboarding in a long time. I wish I had Wheel Shields when I skated across the US, Europe and China. Wheel Shields have changed the longboard transportation paradigm forever. They are an elegant solution to a frustrating problem.
* The quote above was edited slightly on Chase’s Kickstarter page to keep things brief.
** I should also mention that I am in no way officially associated with Wheel Shields, or receiving compensation from them…
In this post I describe how I made a USB smartphone charger for a hub-dynamo-equipped bicycle. The idea came from multiple sources, including Mr. Howdy, Arenddeboer.com, and Peter. But they assume the person making the charger knows how to read a circuit diagram. I cannot understand a circuit diagram. If you’re like me, then this blog post is for you.
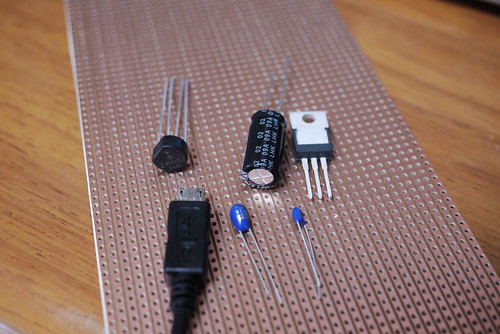
The rundown:
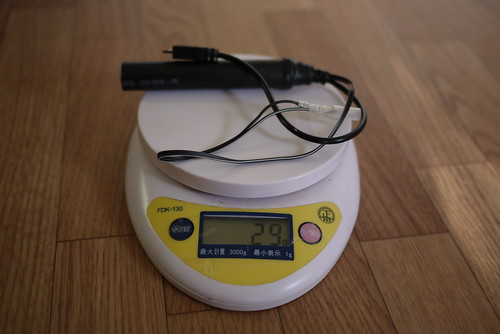
Total cost: approx. US$15 (parts only; you need tools such as soldering iron etc.) Weight: 29 grams Weatherproof: Yes Output: 5 volts DC (USB standard) Input: 6 volts AC Efficiency: Will charge a Sony Experia Z smartphone at a rate of approximately 1% per 1km (with the smartphone turned off). Charge start: 5.5km/h
What this device does When charging your smartphone using a wall charger or your laptop’s USB, the electricity going into your phone is direct current (DC) at 5 volts. A bicycle dynamo hub, however, usually creates electricity in the form of alternating current (AC), at 6 volts. So, we’ve got to change the electricity created by the dynamo hub (6V AC) into the same type as what comes out of your smartphone wall charger or your laptop’s USB (5V DC). That’s what this device does.
Disclaimer: I know nothing about electronics. This charger has worked well for me so far (about 1,000km of cycle touring), but it may turn on you and eat your smartphone’s innards alive, rendering it a useless shell. If you’d rather let someone else take the responsibility for your delicate electronics, check out the Bright-Bike Revolution (amazing value for a solid charger) or the Busch & Mueller Luxos IQ2 headlight with USB charging built in, or the Tout-Terrain Plug II.
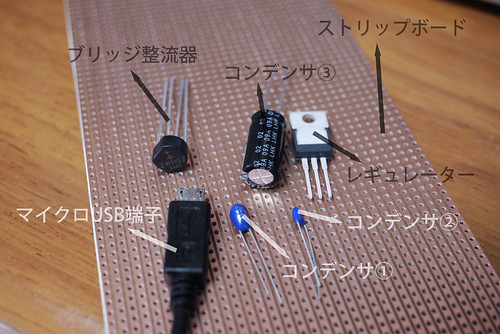
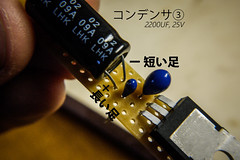
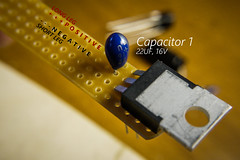
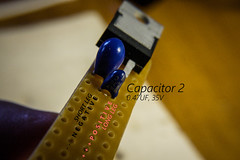
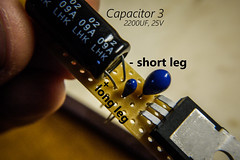
The capacitors help keep the flow of electricity steady as you slow down and speed up on your bike (see Wikipedia for more).
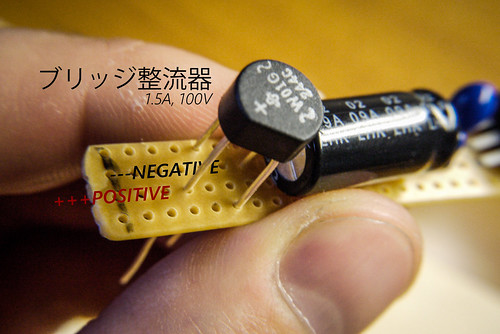
Bridge Rectifier, 1.5A, 100V (example) (changes the input from AC to DC)
Micro-USB terminal (example; you’ll cut off the big USB end and keep the small end, to plug into your device)
Wire and terminals to attach to dynamo outlets
A case of some kind to hold the electonics
Step 1
Cut the veroboard (stripboard) into an oblong, 4 holes wide by approximately 25 holes long. I did this by scoring the board with a craft knife on both sides and then snapping it.
Step 2
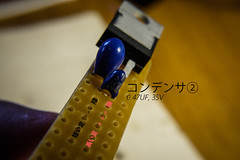
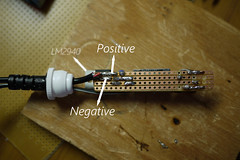
Start to populate your board. On the capacitors, the long leg is positive. Click on the photos for a larger version.
Step 3
This step can be tricky…aligning the bridge rectifier in place. Note the polarity (positioning of the negative and positive legs).
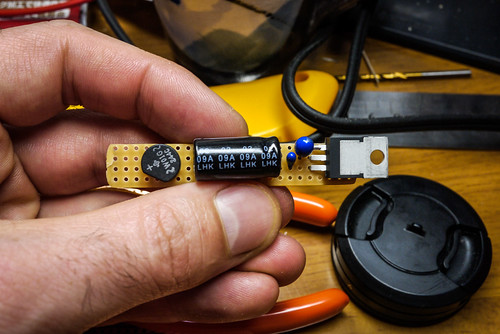
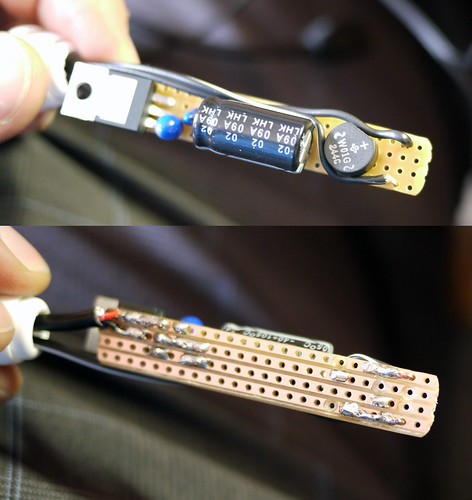
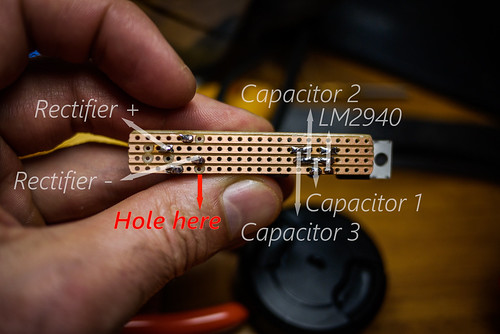
Looking from the top, your board should now look something like this.
You can now go about carefully soldering the parts in place at the rear of the board. Take care not to overheat the parts, and make sure not to ‘connect’ any of the copper strips on the stripboard with stray bits of solder.
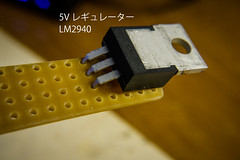
Post-soldering should look something like below. Ignore all the drill-marks, except for the one at the bottom. You need that one to stop current going directly to the regulator (LM2940). Holes can be made by hand-turning a 5mm drill bit.
Step 4
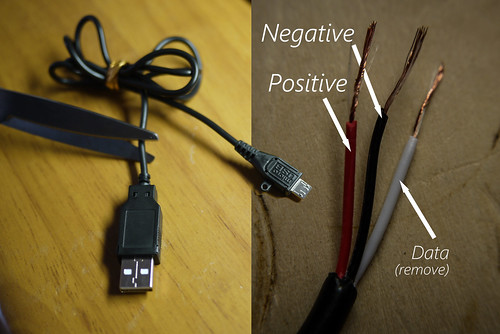
Prepare your micro-USB connector by butchering a cheap USB to micro-USB cable, discarding the big USB end. We will attach this to the circuit-board, and it will plug into your smartphone. Frustratingly, USB cable inner wire colors are sometimes different (like, green for negative). But most of the time, they will be red (positive), black (negative) and white (data). You won’t be needing the white wire, so you can cut it short.
Step 5
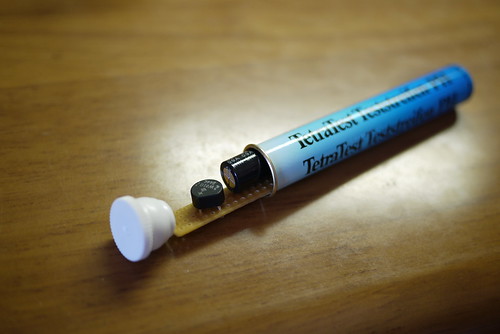
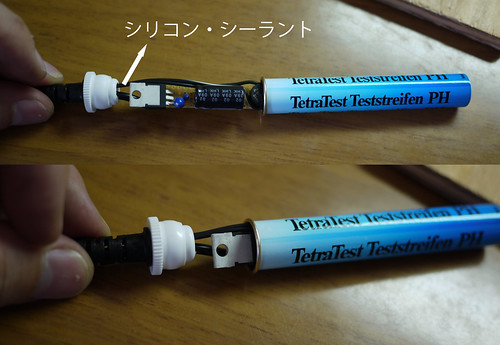
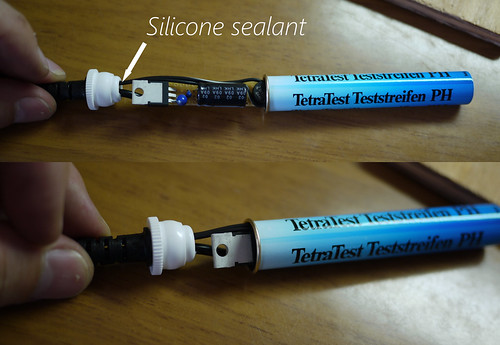
Before attaching the micro-USB cable to the circuit-board, a suitable case needs to be found. I happened to have an old fish-tank PH level tester container hanging around that was a perfect size.
Step 6
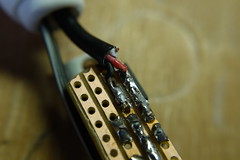
Container sorted, time to thread the cables through the openings and solder them to the circuit board. I first attached the micro-USB cable. Red on the positive line, black on the negative line.
Next, attach the wires that will run from the dynamo hub. The polarity (negative and positive direction) here doesn’t matter at all; the bridge rectifier has magic fairies inside that sort all that out.
Step 7
Install the circuit board in a suitable container. Before sealing the container up properly, now may be a good time to hook the unit up to a dynamo hub and smartphone to check that everything is working.
Step 8
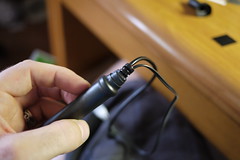
This step is not essential, but I wanted to make this unit as weather-proof as possible. Using a couple of different size heat-shrink tubing, I covered the whole thing up, making it very weather-proof.
Step 9
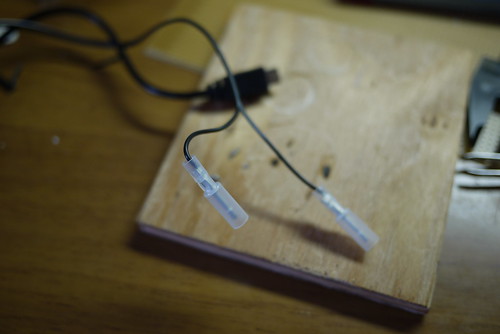
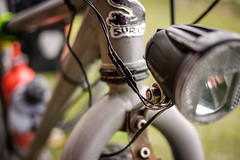
I wanted to be able to easily attach and remove the charger from my bike. The only time I use it is when I am cycle touring (about twice a year). This was easily done by using simple male/female connectors. The wire running from my hub to the female connectors is on my bike all the time, and I can just connect the charger when I need to.
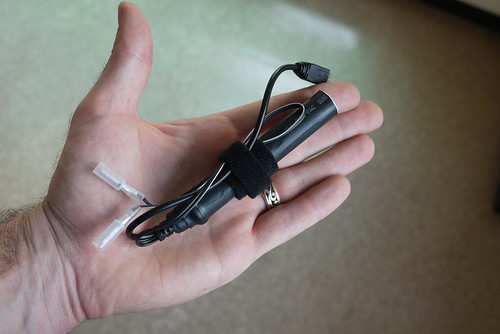
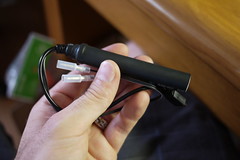
So there you have it. A weather-sealed USB charger, powered by a bicycle dynamo hub. It weighs in at 29 grams. Just lovely.
Performance in the real world
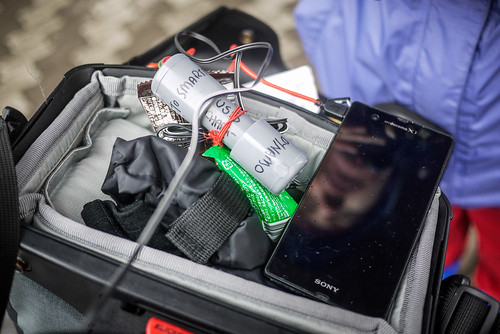
This is the second charger I have made (using the exact same circuitry). The first one ended up in a PVC pipe casing, which is ugly and bulky. It works exactly the same as this new slick-cased version. Using the PVC-pipe-case version, I was able to get around 1% charge for every 1km pedaled on a laden, flat-terrain four-day cycle tour (with the phone powered off). That was charging a Sony Experia Z smartphone, which has a very large battery (2330mAh). With an iPhone, with its smaller 1440mAh, this might be more like 2% charge per 1km.
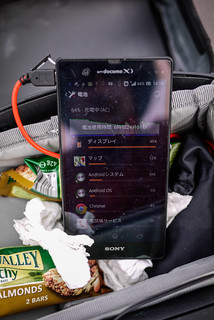
In any case, with the phone powered off, it will charge fully over a full day of cycling. It does not put out enough charge to keep up with intensive computing tasks like Google Map Navigation. That is, with the screen on all the time, plus the GPS running, the battery will still run down even while charging.
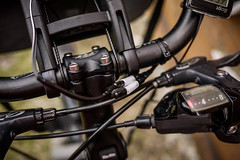
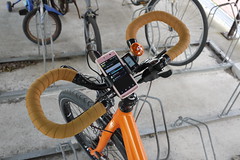
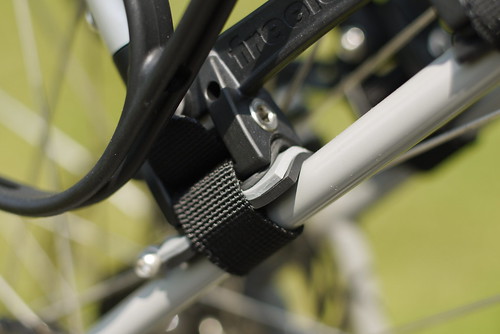
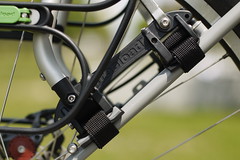
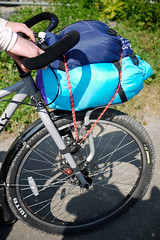
My wife has claimed this new version as her own, so I am still stuck with the PVC pipe version. On her bike, this is the set up we have at present (she doesn’t use a handlear bag). Here, the charger is attached using a cable tie, in the photo at the top of this post, we have attached a velcro strap, which will make attaching/removing the charger easier.
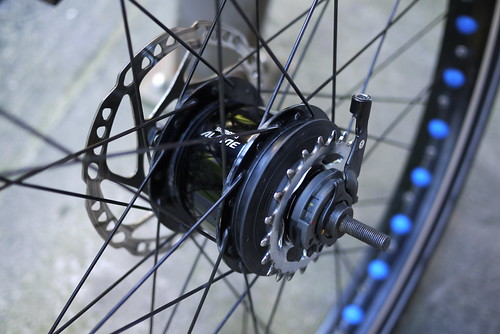
Just over a year ago, I acquired a bicycle – a Surly Karate Monkey (http://14degrees.org/en/?p=1547). Stock standard, the bike is a single-speed. In other words, it has only one gear. This is not conducive to the most efficient cycle touring in the world, so I splashed out and changed to a Shimano Alfine 8-speed internal gear hub (IGH).
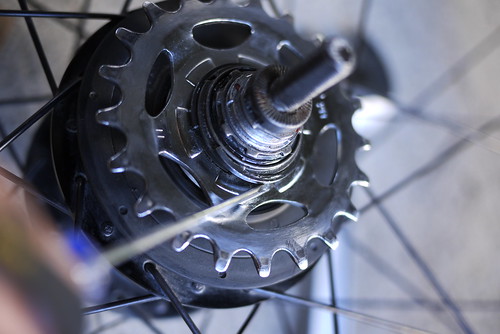
As you can see, there one cog on the outside, and all the gears, in the form of, literally, gears, are on the inside of the hub shell. The beauty of this setup is that a bicycle with an IGH essentially becomes maintenance free (when one compares with a typical derailleur setup, where you have to clean multiple oily cogs quite often).
IGH’s do need maintenance every now and then, though. I’ve heard of some going for three years before being opened up, and the insides looking like new, but after one year, mine was starting to act up a little; a little more friction than usual, and it was sometimes taking a full half-rotation of the pedals in order for the drive to engage after free-wheeling. I live in Sapporo, Japan, and even though this is the land of Shimano, IGH-equipped bikes are extremely rare here, so there was little to no chance of having the hub serviced locally. Therefore, I decided it was time to pull the thing to bits and have a gander.
The most useful resource for learning about how to pull a Shimano Alfine 8-speed hub to bits was this video below.
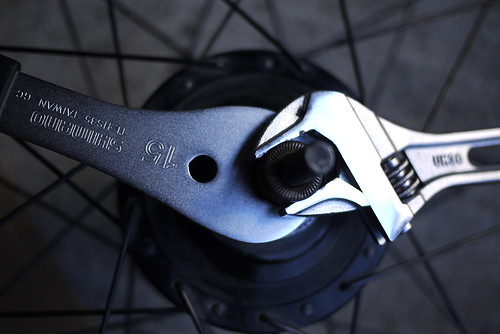
In any case, armed with the right knowledge, and some new tools (I needed a 15mm cone spanner and a centerlock sprocket sans-pin) I got to work.
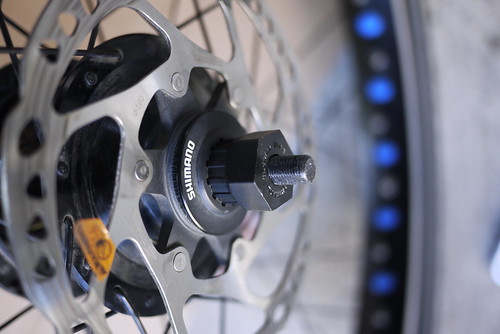
First off is the Shimano Centerlock disk brake rotor. For this, you need a centerlock/cassette tool without the quick-release pin (so it will go over the solid axle of the Alfine hub). The item number on my Shimano tool was TL-FW30.
Once that was off, I was able to access the locknut and cone. Using a 15mm cone spanner and adjustable spanner, I removed the cone.
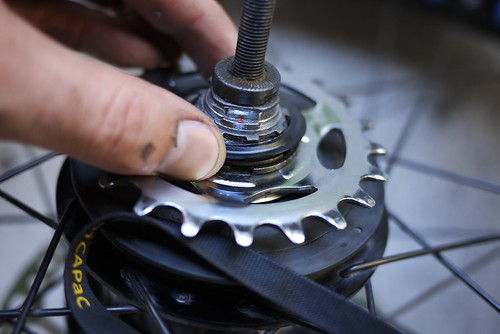
With these removed, the wheel is flipped over and the drive side bits and bobs removed. This includes the shifting accessories which allow access to a small snap-on plastic cover, which is concealing the snap-ring that holds the cog on. This plastic cover can be pried off by hand very easily.
Next is the snap-ring. A small flat-head screw driver does this job well. Keep your free hand over the snap-ring – when it finally comes loose, it will spring off forcefully.
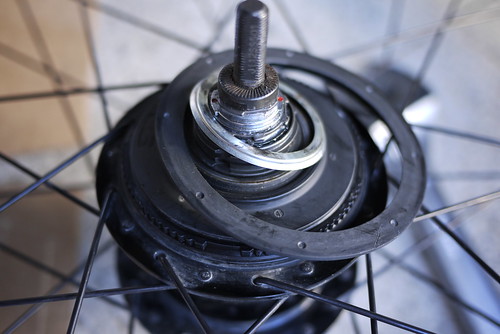
Once you have the snap-ring and cog off, a metal dustguard and plastic ring needs to be removed. The plastic ring provides access to the knobby ‘grip’ of the main screw-on dust-cap, which holds the guts of the hub in.
Some people have reported being able to screw open the dustcap by hand (it screws open clockwise, which is opposite to normal), but I had to take to it with a screwdriver to loosen it a little. Once the dustcap comes free, the whole hub shell will fall away from the insides.
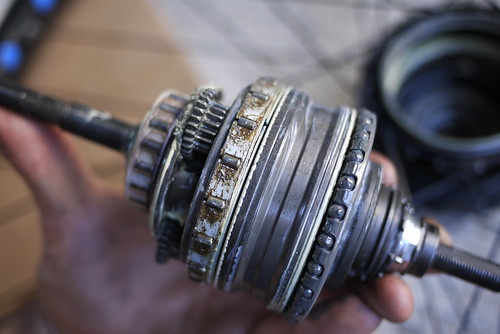
On my hub, I noticed right away that water had entered the hub at some stage. I do vaguely remember the non-drive side cone being loose at one stage, and suspect that this was the culprit. If the cone is on properly, then the rubber seal should prevent any water from getting in. The rusty residue was not too bad though, and wiped off easily. After cleaning the hub shell, however, there were some visible blemishes on the bearing race, but no noticeable pitting.
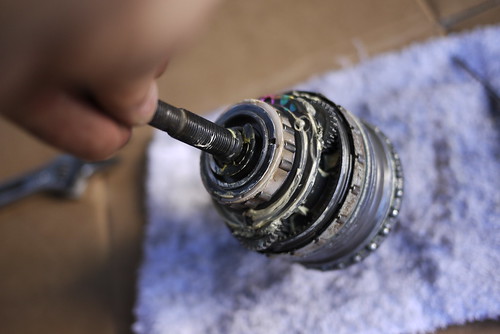
To remove the drive-side bearing cage, the hub needs to be split into two pieces. This is achieved by removing the snap-ring at the non-drive side of the unit.
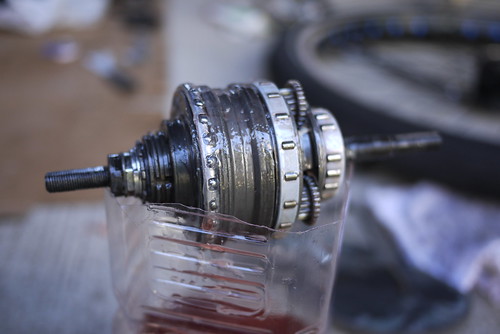
The whole axle unit slides out of the main ring gear unit in two bits (explosion drawing here). There was no visible rust residue inside, so that was reassuring. I cleaned up the drive-side bearing cage, re-greased it, and put the two pieces back together. This is done by lining up the tab on the ring gear unit, and the groove in the axle unit. Even when the tab and groove are lined up, however, the gears need to be rotated around a little to get the ring gear unit to mate to the axle unit (this can take a while to get right).
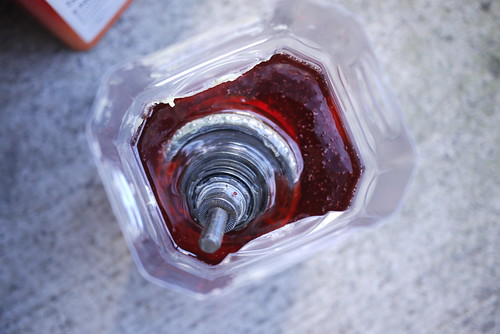
Everything back together, with snap-ring re-installed, the whole lot gets dunked in auto transmission fluid. Mine was just normal, service station (gas station) ATF, using a 2 litre PET bottle as a dunking container.
I left it in for about 5 minutes, and then let it drain for about 10 minutes while I was re-greasing the insides of the hub casing.
The innards then went back into the hub shell, the various dust covers put back on, the cog and snap-ring (which can be infuriating to get on) and the gear-shifting accessories. And then I took it all to bits again. No joke. I had put the drive-side bearing cage on the wrong way around. The picture above shows it in the correct orientation. That was not a happy moment when I had realised I had put it on wrong…
In all, it took me about 45 minutes plus another 20 minutes to rectify the bearing cage issue. Next time it will take around 30 minutes, I would say. That’ll probably be in another 12-18 months time.
Without the oil bath, the hub just has grease inside it. This means there is quite a lot of friction. For example, when back-pedaling the bike on a workstand, the back wheel will start to rotate backwards. With the oil bath, however, backpedaling does not affect the back wheel. I didn’t notice any difference in gear changing; that is as smooth as ever.
This is an idea that I had while skating across China in 2008 for fenders which would attach to longboard trucks/wheels to stop water and road grime from flicking up onto the board. My concept was that the fenders would be made from plastic, and attach on the inside of the wheel. I did this sketch on the 23rd of August 2008.
To my joy, it looks like someone (Chase Kaczmarek) had a similar idea and has taken it from an idea to a prototype product: http://longboardism.com/2012/07/wheel-shields-avoid-wheel-bites-and-skate-in-the-rain.html. Brilliant. He calls them ‘Wheel Shields‘ and it looks as though the main design intention was a device to shield against wheel-bite (the wheels touching the board when in motion and turning, causing the rider to be thrown from the board), with ‘fender’ functionality as an added bonus. The device is patented.
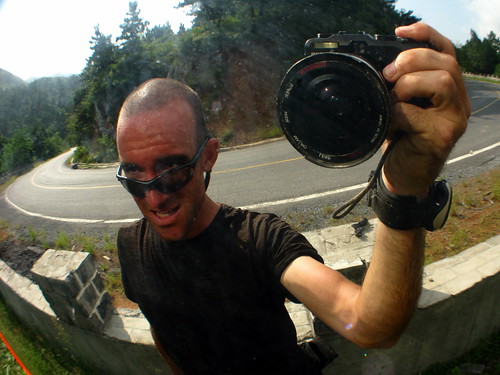
A while back I wrote a screed of thoughts regarding digital camera choices* and mentioned that I ended up buying a second hand Panasonic GF1 micro four thirds camera; a miniature SLR camera that takes nice lightweight interchangeable lenses. Well it has now been a few months since that purchase, and I now have in my camera kit the following:
A selection of step-down/step-up rings for filters
A Zoom H1 sound recorder + hotshoe mount
Spare battery for the camera
Gorillapod Zoom tripod
I was more than happy with the 20mm pancake lens, and this naturally stayed on the camera for 90% of the time. Great for on-the-bike shots.
The camera was slung over my shoulder for about 90% of the time I was on my bike. I do not yet have a decent camera bag for the camera yet, so it just hung un-protected…not particularly recommended, but I never managed to damage the camera (as far as I know). I did have the polarizing filter on the lens almost 100% of the time, however, and when I didn’t have the filter on, the lens cap was certainly covering the lens. The bonus with not having the camera in any sort of case, however, was that it was therefore always ready for action.
What I really missed, was having a handlebar bag. I have since ordered an Ortlieb Ultimate 5 Plus handlebar bag from wiggle.co.uk, but it was a real pain not being able to put the camera away quickly in short rain showers, and then getting it out again quickly once they had passed.
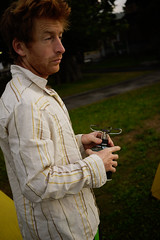
The controls on the back of the camera are really very easy to use one-handed, which is important when on the bike. I could adjust apeture, iso, and white balance all with one hand (I had the camera set to Apeture Priority most of the time) while on the bike; great for when you want to crank the apeture way up in order to capture a sense of speed.
While 20mm (40mm in 35mm equivalent) is on the long side for everyday shots, I haven’t found this a massive issue. I carried the great old Canon 50mm f1.4 FD S.S.C. lens (100mm equivalent) mainly for around-camp shots where I didn’t want to get in the face of my subjects.
The polarizing filter was useful in a couple of ways. One was the obvious polarization feature. Crisp blue skies and true colours are great products of reduced glare and reflection, which the filter helps to reduce.
The other helpful feature is that it is ever so slightly tinted, which means that with the 20mm f1.7 pancake lens on the camera, I can generally take photos at 1.7 apeture even in bright sunlight. This equals a nice depth of field, which would otherwise not be achieved (the camera would either over-expose or automatically drop decrease the apeture). Not as much depth of field as a 3-stop ND filter, but it is a good compromise when you’re touring on a bike and don’t want to be fiddling around with too many filters.
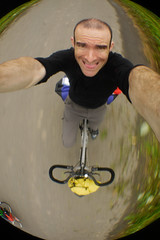
The cheap and battered 0.42x fisheye conversion lens fits on the 20mm f1.7 pancake lens, and provides some light comedic relief, albeit not at the best quality in the world. The Panasonic 7-14mm ultra wide angle lens would be nice, but that’s an extra US$800 or so…so that’s not going to happen in any great hurry.
On the recent 8-day tour I did with a group in Hokkaido, I didn’t end up using the Zoom H1 audio recorder very much at all. I think it got all of about 5 minutes of use. But then, I didn’t take much video either. I think I was concentrating more on getting used to the photo capabilities of the camera on that trip.
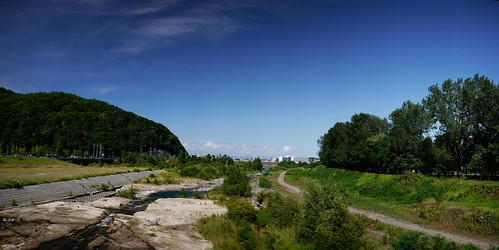
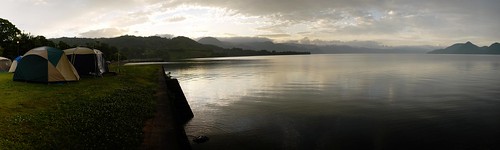
The Gorillapod tripod made a few appearances, but with the speed of the 20mm f1.7 lens, it is not overly necessary save for dark night time shots (the panorama below was stitched in the great free, powerful, and lightweight Autostitch*).
All in all, I am very happy with the Panasonic Lumix GF1. Very versatile, nice and small and lightweight. Great quality photos, and the 20mm pancake lens is magic. I did find myself wanting a zoom lens on occasion, so I imagine that perhaps a 14-140mm lens* could be the eventual next purchase.
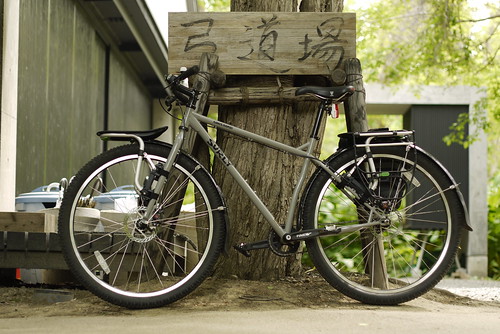
This is part of a series of posts about cycling gear I have been using lately. First up, the mighty Surly Karate Monkey.
Surly Karate Monkey Review Earlier this year, I was looking into bicycle options for life here in Sapporo. I was looking for something that would be as versatile as possible, including something that would be comfortable to ride in the middle of winter here. Sapporo gets massive snowfall in winter; a yearly average of almost 600cm (6 metres!) and an average maximum snowfall in one 24 hour period of 100cm. Unless you’re riding a Surly Pugsley or Salsa Mukluk , you’re not going to be cycling over any snow deeper than 15cm or so, but the local cyclists I talked to here in Sapporo all recommended that I consider getting a 29-inch wheeled mountain bike to handle the icy/snowy conditions in winter in Hokkaido.
With that advice in mind, I approached Surly and asked if they would hook me up with a Karate Monkey frame. Due to supply issues here in Japan, I ended up getting a complete Karate Monkey bike at cost (thanks Surly :-)). I opted for the Karate Monkey simply due to the reputation it has as a no-nonsense, versatile, back to basics bike. Steel frame, great build quality. The bike came set up as a single speed (33t at the front + 17t at the back + Truativ Firex 1.1 + 29-inch wheels = 56.5 gear inches). I have a Shimano Alfine 8-speed internal gear hub on order, but for the last 6 months or so I have been riding it as a single speed. The bike is awesome. I love it to bits. Stock standard with no bitsy accessories, it is like a huge BMX. So much fun. I now have it set up as a commuter/tourer (apart from the lack of gears), and it is very well behaved when loaded up.
Cycling on gravel roads is really where this bike comes into its own. The stock complete bike comes with WTB 2.2 tyres, which is a helluva lot of balloon power. The 700cc rims (well, 29-inch in mountain biking marketing parlance) mean that the final diameter of the wheel is monstrously large, creating a smaller approach angle on bumps in the road, meaning you get a smoother ride. As you can see, I have installed trekking/touring bars on the bike now, which increase the comfort level up even more.
Freeload Racks review on a Karate Monkey
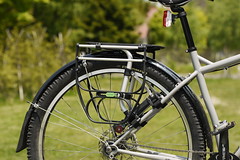
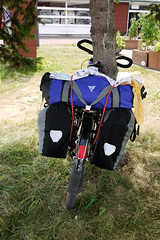
Finding racks for a 29-inch disk brake bike setup can be a little challenging, however I have found that with a little tweaking the Freeload Racks do fit, and are an especially elegant solution for front racks on a Karate Monkey. They fit on more or less any bicycle on the planet (I wonder if they have tried a penny farthing), and are a great piece of ingenuity.
A Freeload Rack on the back of a Karate Monkey is a little more fiddly than the front, since there is nowhere on the rear seat stays where you can get a 100% snug fit onto the frame, due to the asymmetrical spacing of the cable lugs on the Karate Monkey frame. I got the racks sitting even by adding rubber shims to both sides of the mounting feet of the Freeload Racks. Not ideal, but it does the job (and my oh my those nylon straps on the racks are strong).
With shorter chainstays on the Karate Monkey, the adjust-ability of the Freeload Racks on the back of the bike is very helpful for heel clearance. You have to have the pannier mounting rails adjusted as far back as possible, but this doesn’t seem to be too much of an issue. Mounting panniers on the lower of the two pannier mounting rails helps stability even more, however, by lowers the center of gravity overall; this is a great feature of these racks, and especially welcome on a 29-er mountain bike which has a higher center of gravity to start with.
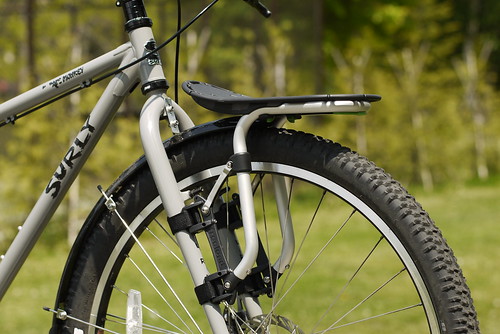
A Freeload Rack on the front of the Karate Monkey is absolutely rock-solid, and is an excellent solution to the no-rack-eyelets issue on Karate Monkey forks. I am thinking of getting a touring platform (one with pannier rails) for the front, as I can imagine that this would be an awesome option for carrying panniers on the front of the bike. On a recent 8 day tour, the “Sports platform” was handy for carrying bulky items such as synthetic sleeping bags or wet tent flies.
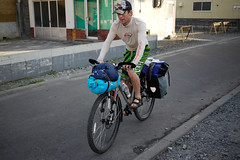
As for loaded touring on a single-speed (not entirely recommended), this is what I had to say previously:
I would say that the single speed gearing of the Karate Monkey (33t at the front + 17t at the back + Truativ Firex 1.1 + 29-inch wheels = 56.5 gear inches) is near perfect for all-round cycling. Even with a load on the bike. So far on the tour, I have not come across any situation when I had to stop and push the bike, but so far I have not had to cycle up steep gravel/side roads…I think that could be a situation where the single speed proves fatal on a bicycle tour. In other words, while gears would be the obvious preferred choice, this particular single speed setup on the Karate Monkey is great for day-to-day riding and on-road cycle touring. It bears mention that I do use SPD pedals. I think the situation could be different if I was not clipped in and using decent stiff soled cycle shoes. That is to say, on the uphills, I have spent most of my time standing up. Essentially spending up to three hours on a glorified stepping machine (albeit with much more interesting scenery than in a stuffy gym). This is doable though. (link)
The recent 8 day summer tour has got me all excited for a winter tour here in Hokkaido
Disclaimer: Freeload Racks sent me a pair of their racks free of charge to test and provide feedback.
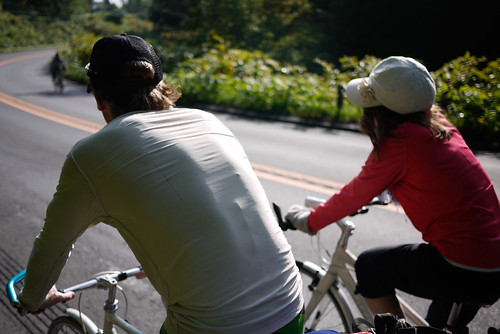
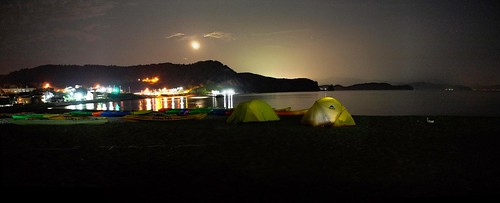
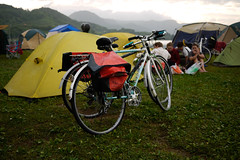
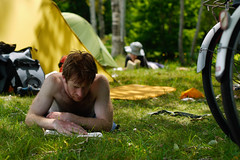
31km on the bike before 10am. Now that’s my kind of morning. But there’s really no excuse not to when the sun rises at 4am!
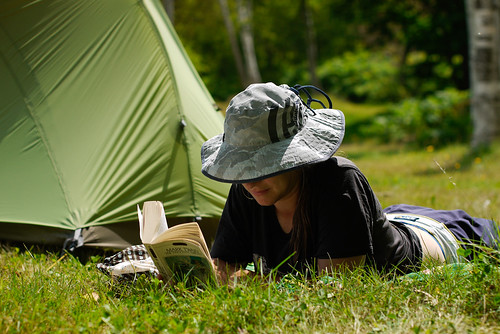
There was more rain in the night, but it had all passed by dawn. We are all using tents owned by Haidee and I, and thankfully they all seem water-tight. Rowland and Alicia are using my ancient Kathmandu North Star Plus tent which I bought during a half-price sale in New Zealand in 2002. I used that 3kg behemoth of a tent on my cycle tour across the Eurasian Continent in 2006, so the tent is understandably showing signs of wear and tear.
The seam sealing on the floor was peeling (replaced with some seam-sealer goop from Montbell), as is the seam sealing on the fly. The tent floor fabric itself has also lost most of its waterproof sealing. Roland and I tried to replace this also, using a special paint-on tent floor sealing product, but this generally just ended up a sticky mess. We ended up having to coat the floor with talcum powder on the morning we all left on the tour because it had not dried in time.
Haidee and I are in the great MSR Hubba Hubba tent we bought earlier this year. It is about 2kg, and is super fast to pitch. Quite unlike any tent I have owned in the past. Very happy with that purchase. Saoka is in my MSR Carbon Reflex 1 tent, kindly supplied by MSR to replace the great little MSR Microzoid tent I used on my longboarding journey across the US and China. I haven’t slept in the tent myself yet, but at around 1kg, and 100g lighter than the Microzoid tent (but with waaaaay more room), it looks to be a near perfect one-person tent.
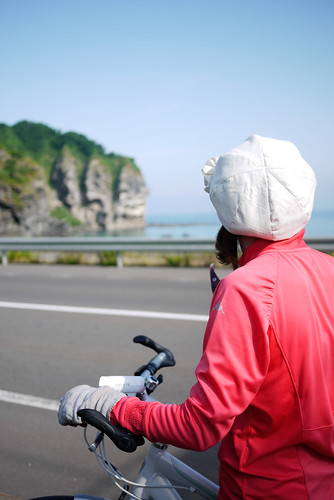
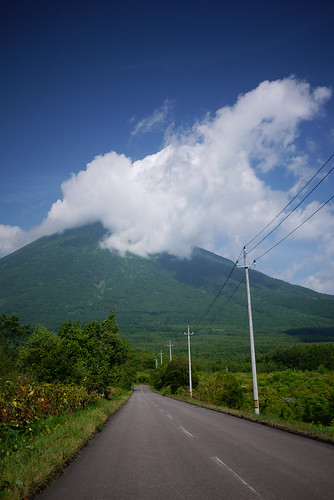
Today’s scenery was simply spectacular. Mt. Yotei, or “little Fuji” as it is known, cut quite the striking figure against a beautiful blue sky.
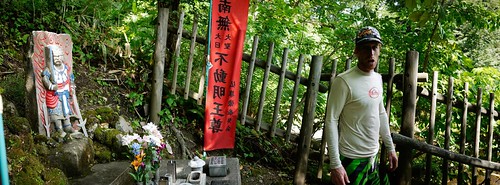
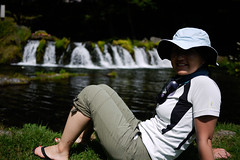
Once again we arrived at our ultimate destination for the day at around 10am. Kyogoku natural fresh water springs was the place. Quite nice indeed. Clear, ice-cold water gushes forth out the ground here in massive quantities. Locals come to fill 20 litre barrels by the trolley-load, Chinese and Korean tourists waddle around by the bus-load, and weary cycle tourists (that’s us) wander around enjoying the cool natural air-conditioning of the flowing waters.
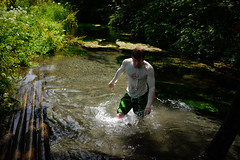
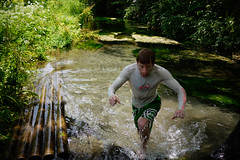
From the spring’s source, it is only a 5 minute walk to the Kyogoku Campground (500yen per tent per night). The water from the spring flows in a narrow stream past the campground, so we all egged each other on to jump in. I was one of the first, and within seconds my legs were cramping from the cold. Rowland followed, and was equally wracked with pain. Saoka wandered into the frigid water as if it was the most natural thing in the world, and proceeded to wander around in the water for at least 5 minutes. 5 seconds in that water and I was in excruciating pain…as was Rowland also.
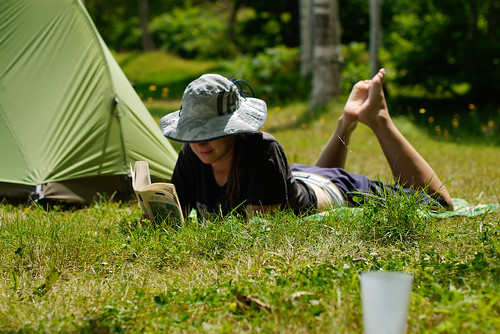
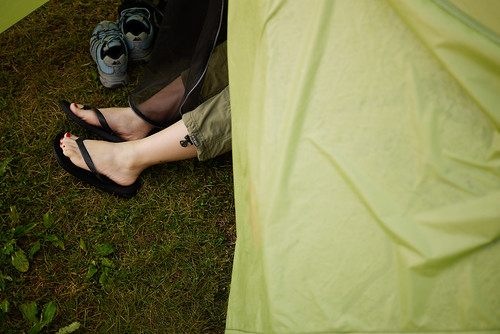
Splashing in the water was followed by pleasant but uneasy lounging in the grass at our campsite. Uneasy in the sense that the site was inundated with ants. Lying in the grass on sleeping mats was an exercise in frustration.
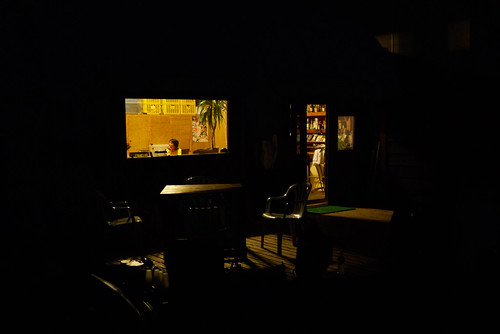
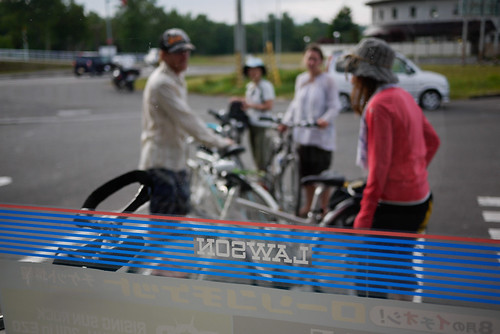
For food on this trip, we have been mainly eating lunches at cheap eateries (usually under 800yen each), and cooking our own dinners with items bought from local supermarkets. Dishes on the menu have included pasta, curry rice, and potato salads. Snacks have been mainly bought from convenience stores, which are to be found in almost any resemblance of a human settlement in Japan. Travelling by bike, camping, and organizing food in this way, Rowland and Alicia have found that it is much cheaper to travel by bike in Japan than it is to travel by public transport and staying at hostels/inns in Southeast Asia.
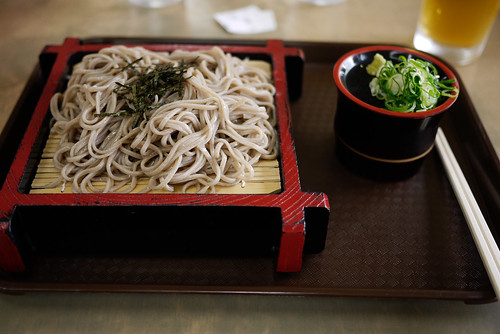
We did splash out a little today for dinner. Instead of cooking it ourselves, we biked 2 minutes to the local onsen complex next to the campground which served an array of cheap, delicious food. Most dishes were under 600yen, and even though the beer was a little on the steep side (450yen for tap beer), it was a nice relaxing way to enjoy the evening. I went for a cold dish; soba noodles with dipping sauce.
Over the last few days I have had two separate people ask me about what I would recommend in terms of a compact digital camera. It just so happens that this somewhat coincides with me taking the plunge and finally replacing my dear old Canon G9 compact camera which stopped working after a fall about 6 months ago. Therefore, what follows is a run-down of what I considered (for about 4 months) when researching cameras.
To summarise this massive blog post, for someone who wants a no-fuss compact camera with good manual controls, then I would seriously look at the Nikon P300, Panasonic LX5, or Sony HX9v.
I considered 4 cameras as definite contenders for what I wanted the camera for: the Olympus XZ-1, the Nikon P300, the Panasonic LX 5, and the Panasonic Lumix GF1. Important features for me were compact-ness, good quality video, a fast lens (a lens which allowed good photography in dark situations), and the ability to get nice depth of field (that sexy effect where the subject is focused, and the background is all blurry), and also the ability to add conversion lenses (like fisheye lenses and other ultra-wide angle lenses).
When I chose the Canon G9 way back in 2007, I chose it more or less because it was the top of the line Canon compact camera and, I could add relatively cheap conversion lenses for shots of me on my longboard or bike.
Therefore, this time around I was also looking at the top of the line compact cameras, in order to get the best performance in a small package. This also meant that I was also looking at paying a decent price for the camera (up to about US$400). The reason I didn’t consider the current generation of the Canon G-series (the G12), was because of the poor video performance (http://www.dpreview.com/reviews/CanonG12/page9.asp).
In the end, I bought a second hand Panasonic Lumix GF1, and I will explain the reasons for that at the end, but first, here are the considerations I made regarding the other three options:
Good Quality Video
First of all, let me define good quality video. I was looking for 1) the possibility of high frame rate recording (60fps), 2) high quality high definition video (at least 720p). I figured that 60fps would give me options for nice slow motion editing, more so than 30 frames per second (which is what seems to be the standard at present for compact cameras with decent video options). But then of course video quality is not all about frames per second. The degree to which the video is compressed is also a factor in how good the video looks on screen. Most high end compact cameras record at about 17Mbps, which is just fine, really. But if increasing the bit rate (decreasing the compression) was possible, then that would be an advantage. In terms of frames per second, the Nikon P300 came out trumps. It can record in 720p HD mode at 60fps, which I thought was pretty cool. The bit rate is also at a respectable 17Mbps. I did read one review which did not rate the autofocus very highly, but all in all it looks like a decent camera from a video quality point of view. The Olympus XZ-1 in video mode shoots at 30fps, and also records at 17Mbps, but there are plenty of reviews out there which suggest there is much room for improvement in terms of autofocus (the camera keeps trying to re-focus) and manual controls in video mode (that is, there are none). The Panasonic LX5, while it does not shoot at true 60fps (it has a 60fps setting, but it is actually shooting at 30fps, and just doubling each frame), allows manual control in video mode, and looks like a very capable camera (albeit quite bulky, as is the Olympus).
Conversion Lenses
Conversion lenses are lenses which fit over the stock lens of a compact camera. That is, on fancy SLR cameras, you interchange the lenses, physically removing the lens each time you want to change lenses. On some high end compact cameras, you can “sheath” the existing lens inside another lens, for either super wide angle shots, fisheye lens shots, or super long telephoto shots. The ultimate factor which put me off the Nikon P300 was the fact that it doesn’t take conversion lenses. I like to be able to have the option to add super wide angle lenses, and even though the Nikon P300′s 24mm equivalent lens is very wide as it is, I wanted to go even wider (as per the shots above). The Olympus XZ-1 and Panasonic LX5 do take conversion lenses, but due to the Olympus XZ-1′s bad video reviews, the Panasonic LX5 was definitely the winner here.
Compactness The clear winner here out of the Nikon P300, Olympus XZ-1, and the Panasonic LX5 is the Nikon P300. You do really get an amazing camera in a very small package (comparatively). You wouldn’t really want to put either the Panasonic LX5 or Olympus XZ-1 in your pocket, but you’d probably get away with it with the Nikon P300.
Depth of Field When I tried out the Olympus XZ-1 in a store here in Sapporo, I was amazed at the depth of field (the camera was also very fast at starting up, by the way; more than the others). dpreview.com consider it one of the better performing compact cameras when it comes to depth of field and I could see why (see here for the review: http://www.dpreview.com/reviews/OlympusXZ1/).
Fast Lens Generally, the smaller the f-value, the nicer the background blurring is. Also, the smaller the f-value is, the more light passes through the lens. Which means that you get better pictures/video at night time or indoors with low light. The Olympus XZ-1 has a very ‘fast’ lens; the lens is f1.8. The Nikon P300 also has an f1.8 lens, but the reason that the Olympus XZ-1 outperforms here is because it also has a larger sensor than the Nikon P300 (why the sensor matters, I’m not quite sure…more area for recording pixels?). In any case, The Panasonic LX5′s lens has an f-value of f2.0, which is pretty fast, and has the same size sensor as the XZ-1.
My Recommendation for a Compact Camera (non-interchangable lens type) Based on the above considerations, and because I love the option of using conversion lenses, I would have gone with the Panasonic LX5. If, however, conversion lens compatibility is not an issue, the Nikon p300 would be my recommendation (based entirely on reviews I have read, not extensive hands on usage). The Nikon P300 has the same size sensor as my old Canon G9, and I got some pretty decent photos out of that.
EDIT: The Sony HX9v also looks like an even better choice than the Nikon P300: Write-up here at DSLR New Shooter. Doesn’t have a super fast lens though…
Conclusion (what I ended up getting) As I said at the beginning of this post, I actually ended up getting a second hand Panasonic Lumix GF1 (body only). This is kind of like an SLR camera, but has no viewfinder, and hence is much more compact than an SLR camera. It is what is called a ‘micro four-thirds’ camera, which means that the sensor size is about 2.5 larger than the Olympus XZ-1 and Panasonic LX5′s sensor, but is about 40% smaller than mid-range DSLR cameras. The ‘micro’ part more or less means that there is no optical viewfinder (more info here: http://en.wikipedia.org/wiki/Micro_Four_Thirds_system). In other words, I can use fancy lenses interchangeably, and get awesome depth of field, and all the other benefits of a larger sensor (whatever they are).
Along with the camera body, I bought a 1970′s manual focus Canon FD 50mm f.14 S.S.C. lens, which can be bought online for around US$50 to US$100, and used on the GF1 with an adapter. Buying second hand means a much cheaper package all round. NOTE: Due to the smaller size of the sensor on the GF1 (compared with bigger SLR cameras), a 50mm lens becomes 100mm, meaning that it ends up being somewhat of a very long lens!
Also a very large part in getting this GF1 (rather than the more recent GF2, or this week announced GF3), apart from price, was that there is a sneaky hack out there which allows a user to increase the quality of the video the camera takes. Without going into too much detail, the camera essentially records at 720p, 30fps, at 17Mbps. This provides very nice video, but using the Ptool firmware hacking tool, it is possible to increase the bit rate to up to 100Mbps! This equals very fine details in video footage. You can also increase the resolution to 1080p, but apparently this does not really increase video quality all that much, so I am more focused on getting the best I can out of the 720p. The frame rate can also be changed to 24fps, but not to 60fps. Using the 50Mbps AVCHD Fast Action 3-Frame GOP Patch, I now have a very compact digital interchangeable lens camera which can take extremely high quality video. Below is a video I took before applying the hack, which just goes to show how good the video is at the stock settings (taken on the Motion JPEG setting).
Here is a video I put together of footage taken with the hack applied (in AVCHD, auto white balance, hand-held):
Was the Micro Four-Thirds Camera Worth it? The problem with the interchangeable lens camera malarkey, is that while you can get some great quality shots, you have to lug around so much more gear. More lenses etc. If you want to travel ultra light weight, then this is the camera to have if you just have to have SLR quality. But if you just want an awesome point and shoot, then this is not worth it. Lenses cost money, camera bags cost money etc etc. That is what I have discovered. When I had my Canon G9, which produced some great photos (if I do say so myself), I could carry it in a small pouch on my belt, and add the cheap fisheye conversion lens (which generally was kept in a simple nylon bag) when I needed it. Simple and light and cheap and robust. Now, I find myself wanting that $800 fisheye zoom lens, and wanting that $400 standard zoom lens, and wanting that $500 portrait lens….
I am, however, stoked to have the micro four-thirds camera. I feel like this will open up all new avenues of expression and creativity. But to my friends who may not care about what the difference is between f’s and mm’s, I would say that the extra bulk and weight of big lenses (even on small camera bodies like even the new Panasonic GF3) is not worth it. Go for the Nikon P300 with its nice wide 24mm zoom lens, very compact size, decent video abilities. If a slightly larger camera size is OK, then go for the Panasonic LX5 for better performance. Or consider the Sony HX9v.
Is Video the Only Thing You Care About? No. I love photos too. But the thing is, as far as I can see, it seems that in terms of photo-taking prowess, the cameras in this post only really have very small differences. That is to say, advances in sensor quality, lens quality, photo-taking prowess etc are now very small; quality is just that high. However, the next few years will see, as the last few years have seen, very big leaps in compact digital video technology. So, while still photography prowess is something to consider, for me, video capture technology is the exciting thing to be following.


 I opted to switch out the tubes for some lighter-weight ones. This is not so much for the literal weight savings, but the thinner tubes make the tires as a whole more pliable, making for a more comfortable ride (tubeless would be ideal, and I intend to make the change at some point).
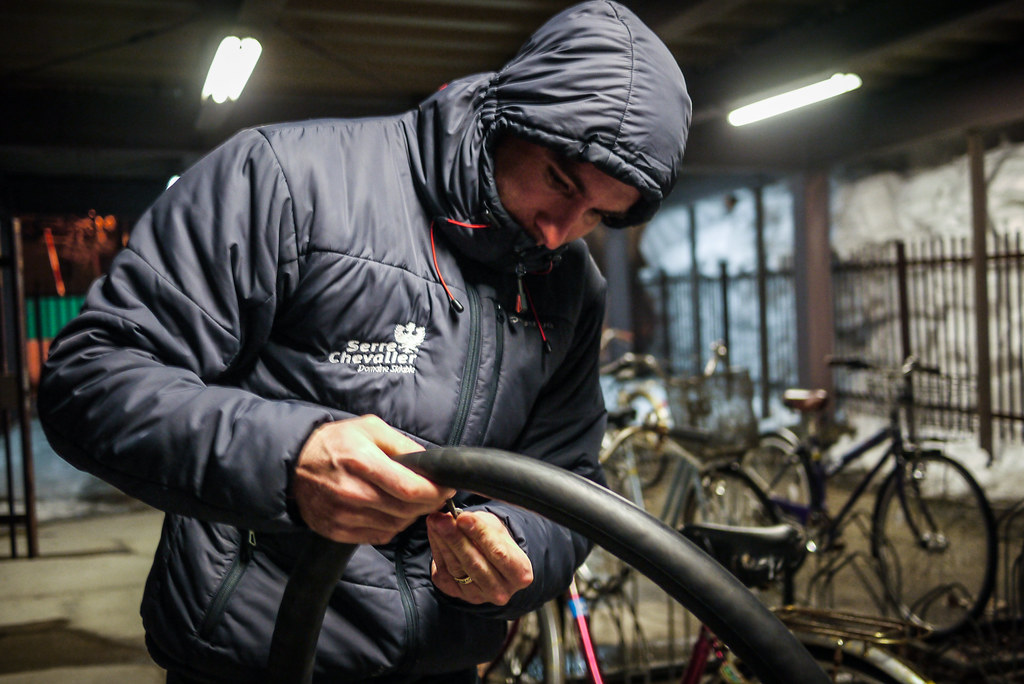
 I have a Shimano Alfine 8-speed internal gear hub (IGH) on my back wheel. This means removing the back wheel involves a few more steps than a standard quick release setup. I also have a full chain cover (Hebie Chainglider). I haven’t removed the chain cover all winter, and the chain looks in relatively good shape (I give it regular squirts of very light lubricant).
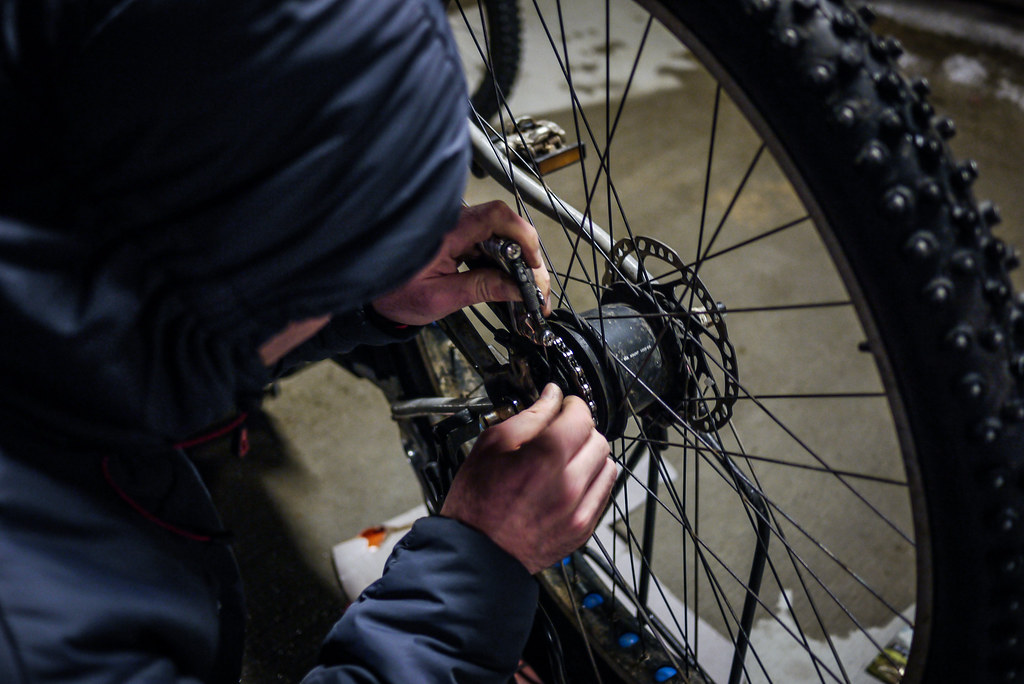 The completed job…
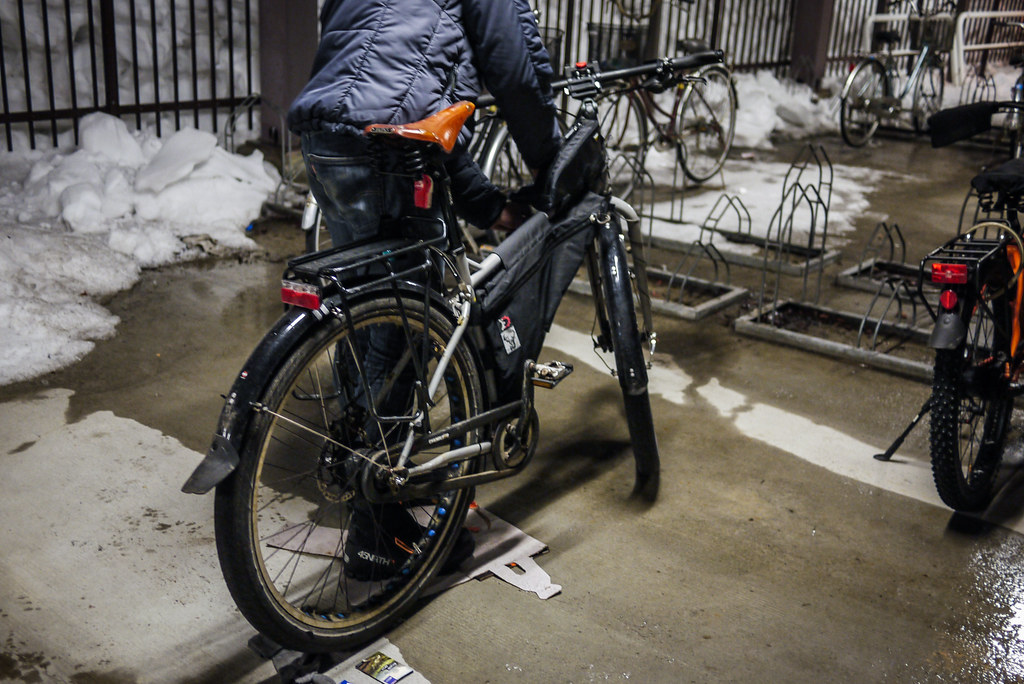 Could do with a more thorough clean of the bike, but that’ll have to wait till a warm weekend.
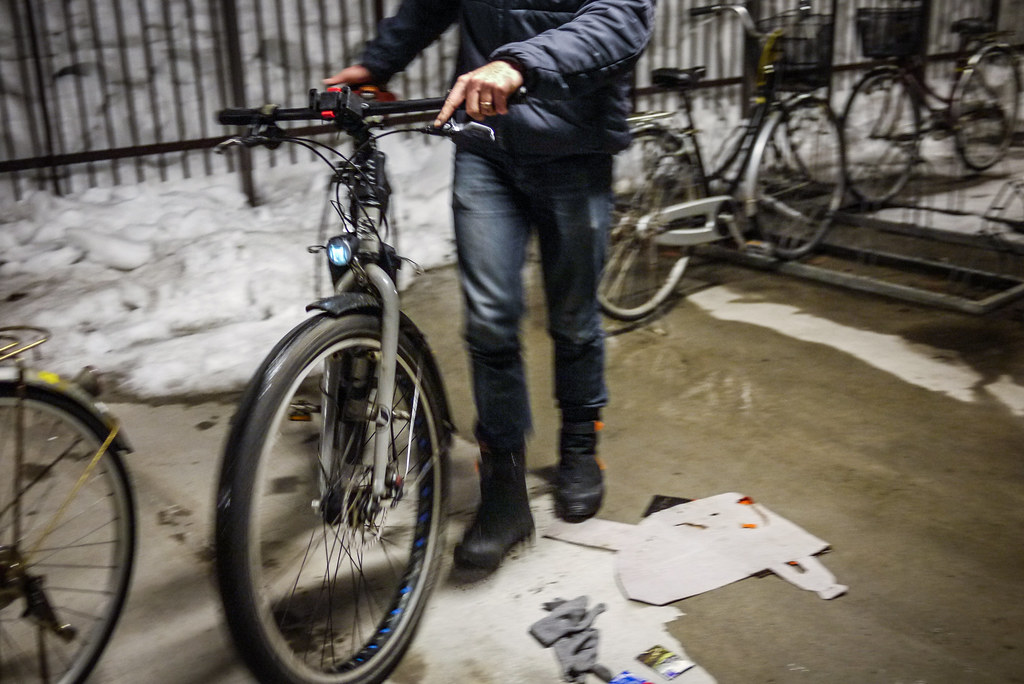 Jobs still to do: