Humble beginnings…

I just got word from Wim Harwig:

“That young guy you saw at the M5 recumbent-shop in Middelburg is now in a team of young students trying to break the world record. I think you took a photo of him when he was working on his wooden low-racer in the shop. Probably you inspired him as a world record holder too ;-) His name is David Wielemaker.”

Good stuff! That young guy is the guy in the photos below (taken on July 26th 2007).

M5 recumbents workshop in Middleburg, The Netherlands

M5 engineer and Wim discuss the finer points of the plywood recumbent in Middleburg, The Netherlands M5 recumbents engineer shows off his plywood recumbent at the M5 showroom in Middleburg, The Netherlands

Here is the video that Wim linked to in his message:

Day 818 – NEW ZEALAND: Street Machine GTe back to its former glory

Waaay back in Switzerland when I decided to send my bike back to New Zealand, I got a shock when I did some research on how much it was going to cost to get a regular sized bike box to New Zealand. I was even considering just leaving the bike in Switzerland due to the high cost. It was going to cost 300 Pounds Stirling to get it to New Zealand. Big bucks.

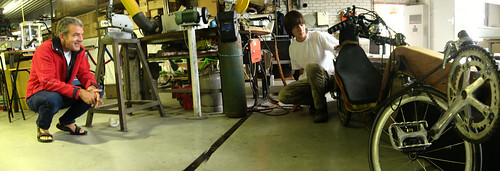
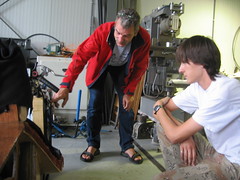
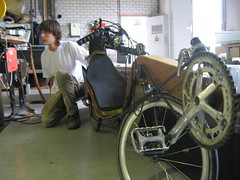
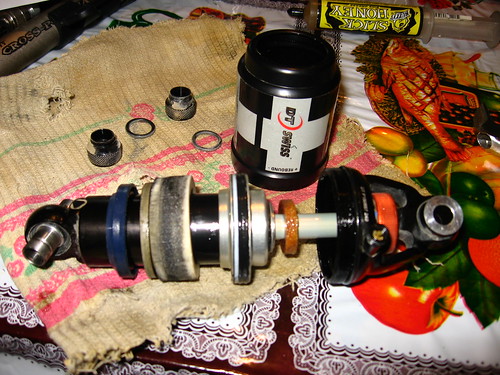
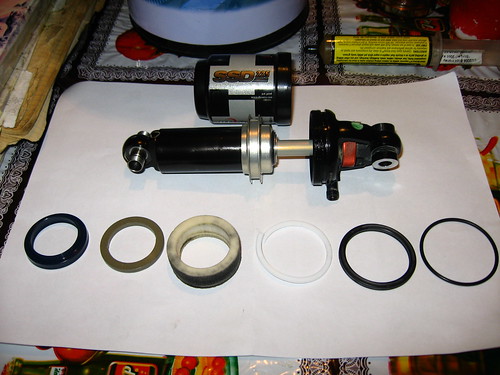
The only solution I could figure out was to try to get the bike into a smaller box. That way, I would be able to send it surface post via the local post office, rather than through a dedicated shipping company. This meant that I had to take the bike to bits big time. The bike is full suspension, so the frame breaks down into three separate bits. With no intention to re-use the cables etc once I got back to New Zealand, I threw those out. I did the same for the chain tubes. Putting the thing back together and getting all the parts took the better part of two days.

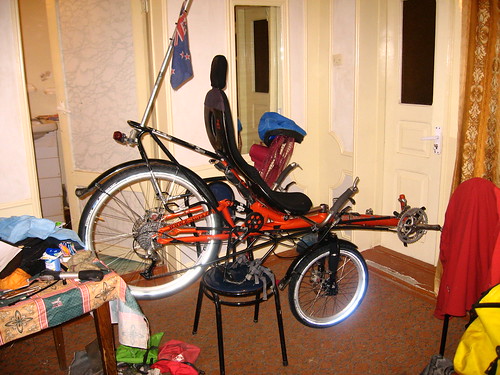
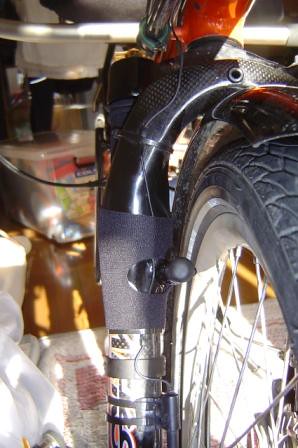
I got the bike together in the end, but not without some improvisation.

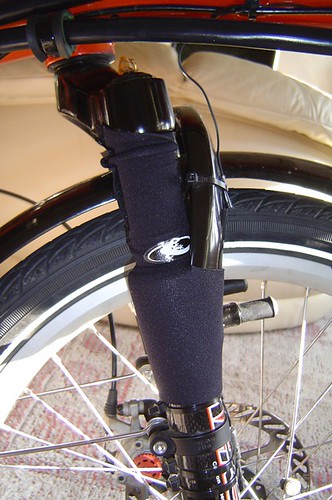
A standard recumbent bicycle uses a chain three times the length of a standard upright bicycle chain. Often the chain runs through plastic tubes to stop the chain from rubbing on clothing, and to keep dirt off the chain. After 12,000km, the original chain tubes on my bike were well and truely worn, despite them being made of low-friction PTFE plastic.

Even in Auckland, the biggest city in New Zealand, I could not find PTFE tubing in the correct size (15mm outside diameter, with at least 1mm wall thickness). So I had to settle with the slightly less friction resistant polyethelene garden irrigation tubing.

A small but significant challenge was moulding the tubing to my use. I had to straighten the tubing, which was easy enough (pour boiling water down the tubing while holding the tubing upright). I also had to spread the ends of the tubing in order to prevent the chain from catching on the edges of the tube.

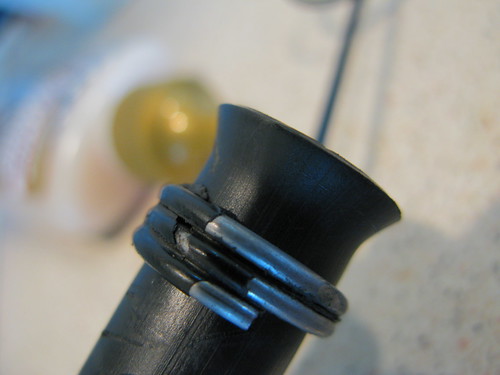
TOP TIP: How to Spread the Chain Tube Ends for a Street Machine GTe Recumbent Bicycle

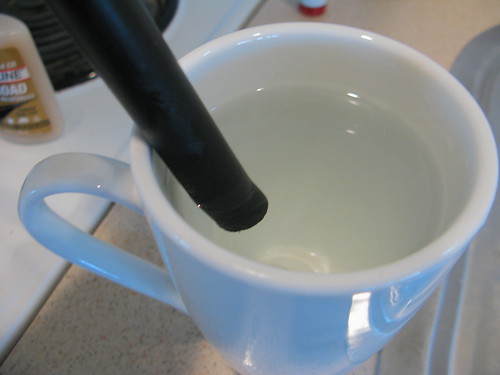
For this trick, you’ll need three things; a bottle of Finish Line chain lube, a cup of boiling water, and your chain tube cut to the correct length.

How to spread the ends of a chain tube for a Street Machine GTe recumbent bike How to spread the ends of a chain tube for a Street Machine GTe recumbent bike

How to spread the ends of a chain tube for a Street Machine GTe recumbent bike

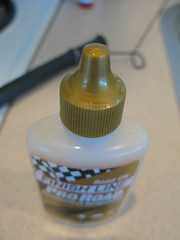
Put the end of the chain tube in the boiling water for 30 seconds.

How to spread the ends of a chain tube for a Street Machine GTe recumbent bike

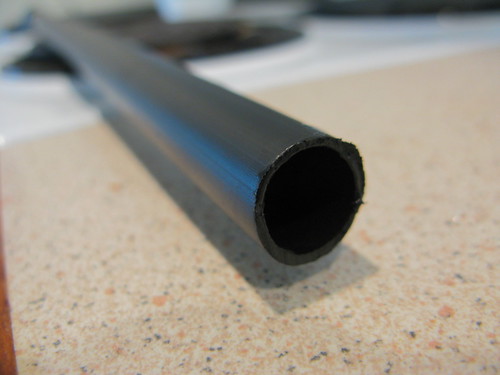
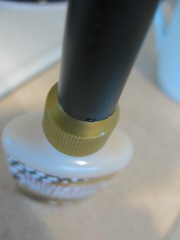
Remove the chain tube and quickly transfer it to the lube bottle cap without delay. Once over the tip of the cap, push down firmly so that the soft end forms to the shape of the cap. Push down enough so that the edges of the tube push past the edge of the cap by about 1mm. You’ll need to really shove hard.

How to spread the ends of a chain tube for a Street Machine GTe recumbent bike How to spread the ends of a chain tube for a Street Machine GTe recumbent bike

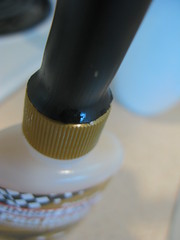
Keep the pressure on for about 20 seconds, and then remove the chaintube from the cap. If you remembered to put the chain tube guide on before you started (for a Street Machine GTe) then you can now slide the chain tube into place.

How to spread the ends of a chain tube for a Street Machine GTe recumbent bike

Day 124 – Bits and bobs

I replaced the seals and regreased the insides of my rear suspension (DT Swiss SSD 225 air shock) yesterday. Fantastic shock by the way. Not a hint of dirt or wear inside. This is the first time I have serviced the thing in 7000km.

Suspension in for a service after 7000km (Samarkand, Uzbekistan) / サスペンションの7000kmぶりのサービス(ウズベキスタン、サマルカンド市)

Suspension in for a service after 7000km (Samarkand, Uzbekistan) / サスペンションの7000kmぶりのサービス(ウズベキスタン、サマルカンド市)

The Lizzard Skin suspension boots have played a large role in this I think. They keep all the dust, water, and dirt off the shocks, so wear on the seals is decreased.

It is very easy to take this shock apart. Put the end in a spanner, and then just screw the housing off with your hand (make sure the air is totally removed before taking it apart!)

Makeshift workshop in my hostel room - Samarkand, Uzbekistan / 工場兼部屋(ウズベキスタン、サマルカンド市)

Pre-Departure (37 days): For video viewing pleasure

I was never too happy with the fact that viewing videos on my site required viewers to click on a link, and be taken to an outside site (Google Video). Therefore, I have changed things around a bit where the videos now open in a popup window, along with a short description of the video. The videos are hosted at YouTube, which in my opinon has better playback quality.

There is also a new video on the videos page that shows how to remove the hydraulic damper cartridge from the HPVelotechnik Meks Carbon AC suspension forks. Some moisture had found its way into the sanchion tubes of the forks, so I needed to take it to bits to dry it out. A simple enough procedure of removing the bottom 6mm bolt, and then removing the damper cap along with the cartridge.

Pre-Departure (50 days): New video

On a scale of cheap processed cheese to thick and creamy Swiss fondu, this video is dripping with fondu. I have made a video where I am describing the recumbent that I’ll be riding on this trip. It sounds more like an infomercial than anything else. But the goal of the video isn’t so much to introduce the bike, but to assure potential sponsors that I can actually speak Japanese. Already I have had a nibble on the sponsorship side of things, so it will be interesting to see how things pan out over the next couple of weeks.

Check out ‘The 14degrees Bike‘ video.

Pre-Departure (67 days): new video – the daily slog

Another zoomy video for you. This one is of my daily commute to work. I live at about 10m above sea level, and work is at 350m. It’s a big hill, but after a few weeks it’s a no brainer. The total distance is 12km. These videos were shot on a small Sony Cybershot P-8 digital camera attached to an aluminium tube that is attached to my rear carrier. Makes for some interesting footage.

The editing was done on the Windows XP stock standard Windows MovieMaker. All you really need for simple wee vids. The videos have been uploaded to Google Videos, which means that all I need to do is copy and paste the embed code in my blog, and I can have the videos play on my website. This is great coz it means that not only do I not need to use up my webserver account space with videos, but it also means that there’s no chance of exceeding the bandwidth limit I have on this account (5GB).

Enjoy.

Update: It’s now 11pm, and I still haven’t got this google video embedding things worked out. For the meantime, I’ve just uploaded the video to my server, so it can be downloaded by clicking on this link (right-click and save as):

http://14degrees.org/videos/daily_slog.wmv
(3mins07sec - Windows Media – 42MB)

Pre-Departure (71 days): MULTIMEDIATED!

Has been a busy weekend:

  1. New slideshow photo gallery. Big ups to Rich for letting everyone know about it on his blog. Even bigger umpa lumpas to Yuan.CC Web Experiments for making it so easy to make a slideshow for your site using uploaded flickr photos.
  2. Video page. Will be adding to this as time permits. There is one vid there now. I made that one today after strapping a tube of aluminium to the rack on my bike, then attaching a camera to that. If you’ve ever wanted to know what riding a recumbent feels like, then maybe this video will give you an idea.

Pre-Departure (113 days): Bike suspension boots

The HPVelotechink Street Machine GTe comes with front and rear suspension as standard. I upgraded to the lighter Meks Carbon AC front shock and DT-Swiss rear airshock. While both shocks seem to be very high quality, the reality is that they are moving parts that are affected by water and dust. Therefore I’ve added shock boots (covers) to both the front and rear shocks.

Front shock
Front fork boot II / 前のサスペンションのカバー 2

Front fork boot / 前のサスペンションのカバー

Rear shock
Rear shock boot / 後ろのサスペンションのカバー

The front boot was especially tricky to get to fit correctly. I had to cut it to fit. The photo is of the nicely done side. The other side, which I did first, is a bit of a mess – but it should do the trick.

Hopefully these skinned lizards will help the suspension to last 12000km to London!

Pre-Departure (125 days): 5th Annual Oita Charity Ride

I arrived back in Beppu yesterday from three days riding around Oita Prefecture (and a wee bit into Miyazaki). The event was the Annual Oita Charity Bike Ride, organised by the Oita JET group. The charity was raising money for schools in Vietnam (www.roomtoread.org).

The total distance of the ride was 270km. 100km the first day, 90 the next, and 70km the last day. Weather was rain on the first day, fine the next two. For me, this ride was a good opportunity to test out the new recumbent to see if all the hype about them being good for long distance riding is true. It certainly lived up to expectations on the route that included some very hilly costal sections. Here are my findings:

Minuses:

  1. Quite slow up the hills

Pluses:

  1.  Feet don’t get wet in the rain. With your feet up and out of the way, water does not get splashed into shoes. My riding buddy was complaining of wet cold feet after about fifteen minutes of riding, whereas I had dry socks at the end of the day.
  2. Mush easier riding in a head wind. A lower profile along with a smaller frontal area really makes a difference on the flat with a head wind.
  3. No sore back, wrists, hands, neck. No need for special cycling gloves.
  4. Downhills are smooth and balanced, with quick cornering.
  5. It’s more comfortable on the bike than off. I’d rather be sitting on the bike during a rest period than standing up or sitting on the ground.
  6. It is totally true that the only thing you feel after riding a day on a recumbent is tired legs.

My pet phrase for the three days was ‘I remember the days (of sore bottoms, wet feet etc)’. Riding a recumbent really does make cycling a no-brainer.

As for the one minus that I noticed over the course of the trip, I’m confident that this is just a matter of strengthening my legs in the new movements of riding a recumbent. Also, so long as you change into a low gear and spin, the hills aren’t that big a problem.